Before printing Accounts Receivable Statements, review Pre-Statement Procedures below:
QS/1 recommends that you perform the following steps prior to printing statements. Some of these procedures may be done on a daily basis and should be completed prior to the day of printing statements.
Before processing statements, run Automatic Account Posting. Enter all payments, manual charges and necessary credits for the billing period.
Print a daily proof to list all charges processed through Automatic Account Posting. This report also lists entries manually charged, posted or paid. Check for posting errors.
The Account Trial Balance Report is a mirror image of the accounts receivable statement; it lists each current transaction as it appears on the statement. The report is used to check for errors before printing statements.
Accounts Receivable File Backups
As a security precaution, back up the Accounts Receivable File and the Accounts Receivable History File. If an error occurs when printing statements, these backups may be needed to retrieve files. Save this backup in a secure location until the next statement run.
To print A/R Statements:
1. Access PrimeCare.
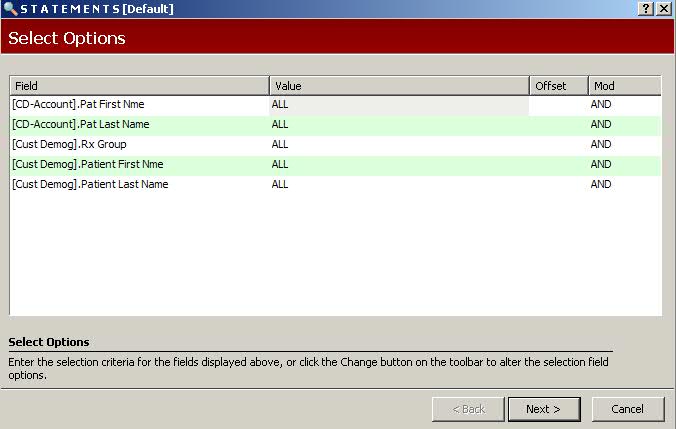
2. Click A/R. Select Statements and click Print Statements. Statement Select Options display:
3. Use the following definitions to complete the Select Options:
[CD-Account].Pat First Nme - Option is used to print statements for one, several or a range of patients. The default value = ALL.
[CD-Account].Pat Last Name - Option is used to print statements for one, several or a range of patients. The default value = ALL.
[Cust Demog].Rx Group - Type group codes to print statements for a specific patient group. Type YES to print statements for patients who have an entry in the Group field on the Patient Record. The default value = ALL.
[Cust Demog].Patient First Nme - If printing a single statement, type the first name of the patient. The default value = ALL.
[Cust Demog].Patient Last Name - If printing a single statement, type the first name of the patient. The default value = ALL.
4. Complete the options and click  . Sort Options display:
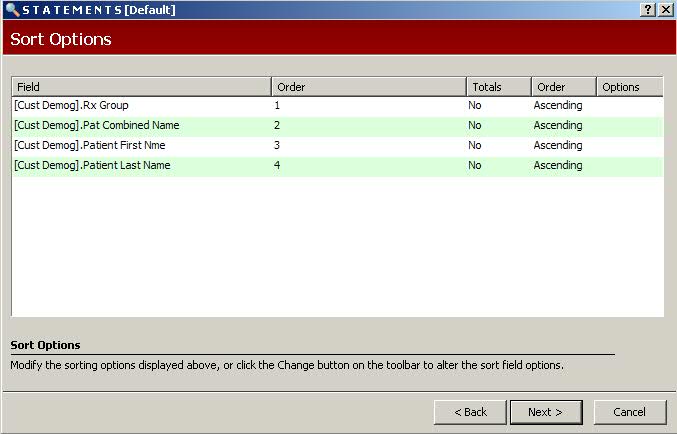
5. Complete the options and click . Print Options display:
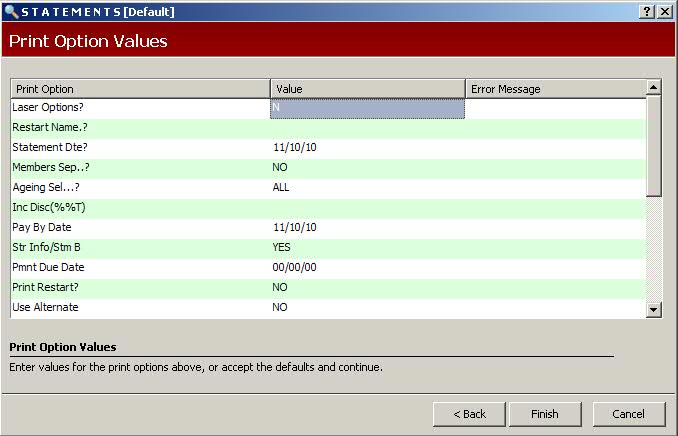
6. Use the following definitions to complete the Print Options:
Laser Options? -
Valid entries for printing statements on plain paper:
Position 1 - Type Y if printing statements on a laser printer.
Positions 2 and 3 - Type the number of statements to print (01-99). If this field is left blank, only one statement per customer prints.
Position 4 - Type 1 to turn on the overlay if printing on plain paper.
Valid entries for printing statements on preprinted forms:
Position 1 - Type Y if printing statements on a laser printer.
Positions 2 and 3 - Type the number of statements to print (01-99). If this field is left blank, only one statement per customer prints.
Position 4 - Type 2 to turn off the overlay.
Position 5 - Type I for IBM printers. Type H for HP printers.
Positions 6 and 7 - Determines the horizontal alignment on the form. The default entry is 01. Valid entries are 01-15 to adjust the alignment.
Positions 8 through 11 - Determines the vertical alignment on the form. The default entry is 0131. Valid entries are 0030-1000 to adjust the alignment.
Restart Name.? - If printing errors occur, type the name of the patient (last name, first name) that printed last. Printing restarts with this patient.
Statement Dte? - Type the date to display on the statement.
Members Sep..? - Valid entries:
Type YES to print separate statements for each family member. This option does not print past due amounts.
Type YES1 to print separate statements for each family member with the same C-ACCT name. Past due amounts print for each individual to the left of the patient information.
Type YES2 to print past due amounts only when the patient name is the same as the C-ACCT name.
Type NO to print all members with the same C-ACCT name on the same statement.
Ageing Sel...? - Type ALL to print all accounts selected on Select Options. Other valid entries:
Type 00 to print accounts 0-30 days past due.
Type 31 to print accounts 31-60 days past due.
Type 61 to print accounts 61-90 days past due.
Type 91 to print accounts 90-120 days past due.
Type 121 to print accounts 121-150 days past due.
Type 151 to print accounts 151-180 days past due.
Type 181 to print accounts 181 days or more past due.
Inc Disc(%%T) - To give an Incentive Discount, type the percentage of the discount in the first two positions. Type a leading zero for 1-9%. Type A in the third position to discount all items. Type R in the third position to only discount items with a number in the RX Numb field. If R is typed, Pay $$$.$$ by MM/DD/YY prints on the statement.
Pay By Date - If using the Incentive Discount option, type the date by which the payment must be made to qualify for the discount. This date prints on the statement. Bypass this option to leave the field at today's date.
Str Info/Stm B - Type YES to print the store name. Type NO if the statements are preprinted.
Pmnt Due Date - Type the due date in the MM/DD/YY format.
Print Restart? - This option works with the Restart Name option. Type YES and type the charge account name in the Restart Name field.
Use Alternate - Type YES to print the patient's alternate address. If the alternate address is not available, the patient address prints as usual. Type NO and the patient address prints as usual.
Print OMR? - If using the Pitney Bowes OMR machine, this option prints an OMR that indicates where to fold the statement. Valid entries:
Position 1 - Type Y to print the OMR.
Positions 2 and 3 - Type UL to print the OMR in the upper left corner. Type LR to print the OMR in the lower right corner.
Positions 4 and 5 - Vertical alignment of the OMR.
Positions 6 and 7 - Horizontal alignment of the OMR.
Prt MRM/Stm B? - Type YES to print the patient's Medical Record Number. The option, Members Sep..?, must be YES to print the Medical Record Number.
Prt Recap Ttls - Statements printed using Sort Option, Patient Alias, can be misaligned and unclear when printed with recap totals. Type NO to print statements without Recap Totals and prevent issues with the Patient Alias Sort Option.
7. When options are complete, click  .
A/R Alternate Store Information displays:
.
A/R Alternate Store Information displays:
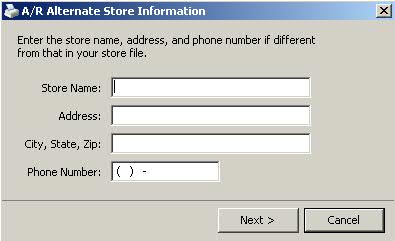
8. Type alternate information is needed
and click . Statements print
and the Age Accounts and Print Finance Charge Report prompt displays:
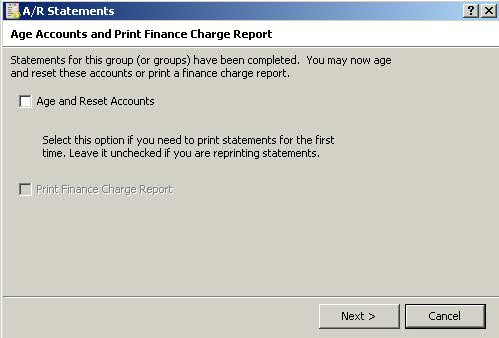
9. Check the Age and Reset Accounts ONLY IF ALL STATEMENTS PRINTED CORRECTLY. Check the box, Print the Finance Charge Report, to print the report. An Age and Reset Accounts warning displays:
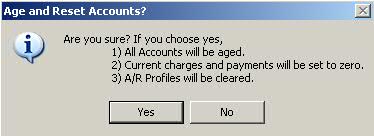
10. Click  and payments
and credits are subtracted from the oldest balance on the customer accounts.
Current charges are moved to the 0-30 ageing bucket and all other balances
are moved to their next respective bucket. The Patient Record displays
0.00 in the current charges and payments field. Click
and payments
and credits are subtracted from the oldest balance on the customer accounts.
Current charges are moved to the 0-30 ageing bucket and all other balances
are moved to their next respective bucket. The Patient Record displays
0.00 in the current charges and payments field. Click  if there are statement printing errors. Balances are not adjusted until
the A/R File Compression is completed.
if there are statement printing errors. Balances are not adjusted until
the A/R File Compression is completed.
11. The next step in the statement process is A/R File Compression.
Return to Accounts Receivable Overview