Modified Require RPH to Offer Counseling Electronic Signature Option
Modified Require RPH to Offer Counseling Electronic Signature Option to prompt for a pharmacist login in order to log the pharmacist who offers/performs patient counseling in the following scenarios:
Signature capture when selecting prescriptions from the Prescription Status
Signature capture from the Transaction Record
Signature capture when checking out prescriptions through Point-of-Sale
Signature capture through Remote Checkout
Wireless Signature Capture
eSigCap (from the iPad)
Added a Note field to the New Prescription Pharmacist Required for Counseling window which holds up to 200 characters.
Added a Counseling Note link to the Transaction Update, Transaction Signature screen. When the link is clicked, a Counseling Note window displays the note that was entered on the New Prescription Pharmacist Required for Counseling window. Only a pharmacist is able to edit a Note from this window. If changes are made to the Note, log the pharmacist who is logged into the application as the pharmacist who last made an update as well as the date and time of the change. NOTE: Counseling times display in military time to match the signature time.
Added Print Note Print Option to the Counseling Log report. The option defaults to NO. If YES, the counseling notes print on the report below each prescription. If NO, the reports prints like it currently does.
Modified Report Format 3 of the Transaction Signature Log to print the counseling note if one exists for a prescription transaction.
Modified the Store Control, Store Level Options, System/Electronic Signature Options
Renamed Require RPH to Offer Counseling on New Rx option to Require RPH Login to Offer Counseling with the following sub options:
New Rx: Check to prompt the pharmacist login to log offering counseling for new Rxs.
Refill Rx: Check to prompt the pharmacist login to log offering counseling for refill Rxs.
Added a new Electronic Signature Option: Require RPH Login to Perform Counseling. The option defaults to NO/unchecked and determines whether to display a pharmacist login to log the performing pharmacist when counseling is requested by patients. NOTE: This option is dependent upon the Offer Rx Patient Counseling option being turned on. If Offer Rx Patient Counseling is turned off, Require RPH Login to Perform Counseling will be inactive/grayed out.
Added Patient Declined Counseling option to Transaction Update, Transaction Signature screen. For existing prescription Transaction Records, this option displays as checked or unchecked based on the MTD field. For new prescription Transaction Records, the field defaults to unchecked. If the patient declines counseling, the flag changes to checked. NOTE: If the user attempts to check Counseling Performed without selecting the RPH that performed counseling, a message displays prompting the user to enter the counseling performed RPH information.
Created an interface for immunization reporting
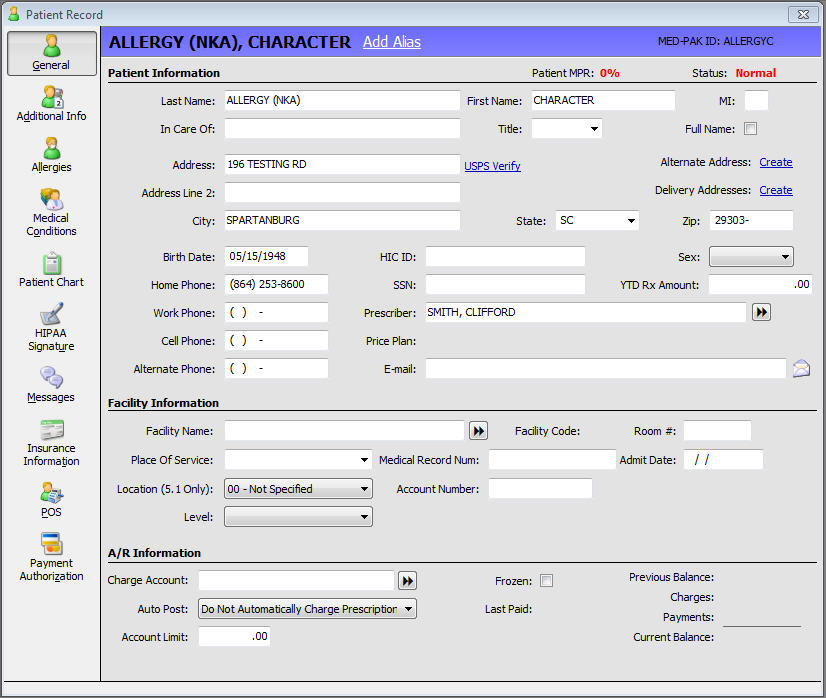
Added a Patient Chart button to the Patient Record. NOTE: The Patient Chart is still accessible by clicking View, Chart from the Patient Record.
Added new fields and modified others on the Patient Chart.
Added new fields and modified others on the Immunization Record.
Modified the Immunization Record.
Modified the Rx Summary screen.
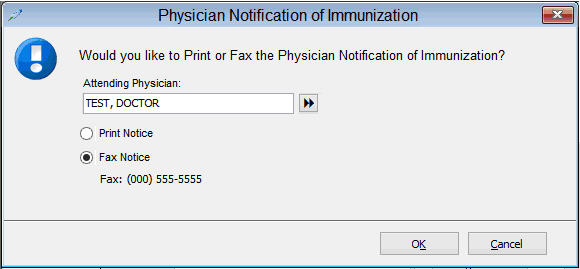
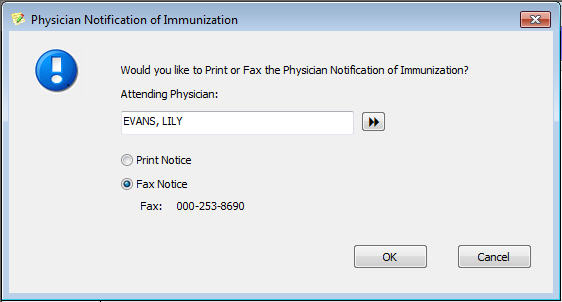
Added the ability to print an Immunization Physician Notice from the Rx Summary screen and the Patient Chart/Immunization Records screen.
Modified the following reports:
Modified the Store Level Options, System/Document Management Interface option, if the pharmacy is authorized for QS/1 Document Management (QDM)
Added a Form button to the vertical toolbar on the QDM Options screen. The window displays a grid of Document Types that are currently available. The Document Type Column will be static. The only Document Type added to the system is Physician Notification of Immunization. The other columns that display are: Form Template, Queue, Subject, and Pend Only.
After all fields are populated in Store Level Options for the Physician Notification of Immunization, the system will auto populate the fields on the Physician Notification of Immunization window. A Form option with a link beside it displays below the Print, Fax Notice options. The link defaults to the Default Form, but users can select a New Form from the Available Forms list. The Fax Notice Option displays with the Subject Line entered in Store Level Options, but it can be changed. An Additional Comments field also displays. The Pend to Queue options defaults according to the value in Store Level Options. If Pend to Queue is checked, the system will NOT Queue the Fax for Sending, but will instead just complete the document and merge it into the Default Queue specified in Store Level Options. When Pend to Queue is checked, the system disables both the Subject and Additional Comments fields.
Added the ability to automatically submit prior authorizations to CoverMyMeds (CMM)
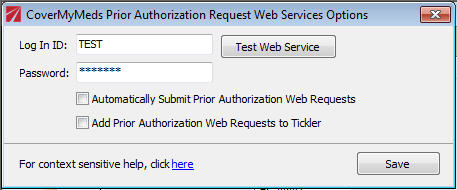
Added the option Automatically Submit Prior Authorization Web Requests to CoverMyMeds Prior Authorization Request Web Services Options located in Store Level Options, Prior Authorization Web Services hyperlink. The option is defaulted to checked. When this option is checked, the system automatically submits a PA Request to CMM if the Reject Code that comes back on the Claim Response is on the list of Eligible PA Reject Codes.
Added additional Reject Codes to the PA Web Request Check: MR, AG, A5, A6, 569, 7X, 7Y, or 9G. When a claim rejects for the following NCPDP D.0 Reject Codes, 70, 75, 76, MR, AG, A5, A6, 569, 7X, 7Y, 9G, the system makes the Claim Eligible for a PA Web Request to be sent from the application. When a claim is eligible for a PA Request, the system displays a PA Web Request button on the Claim Rejection Detail screen.
Added a PA identifier to the Electronic Claims Log. When a claim rejects for one of the eligible Reject Codes, the system displays PA to the left of the Rx inside the Claims Log. Since a Resubmit creates a new ECS Record, the PA Identifier continues to display on the Rejected ECS Record, even when the record has been Deactivated. NOTE: If CMM responds with either a Required Action or Manual Send, the PA identifier displays in red.
Added a PA Web Request status field to the top of the Claims Rejection Detail screen. NOTE: The field only displays when the claim rejects for a specific Reject Code and a PA Web Request has been submitted.
Modified the TX PA field. Valid options are now 0, 1, 2, or 3.
| PA Field Values | PA Web Request Message |
| 0 | PA has NOT been Submitted |
| 1 | PA has been Submitted and CMM did not return a "Required Action" or "Manual Send" Response |
| 2 | PA has been Submitted and CMM returned a "Required Action" Response |
| 3 | PA has been Submitted and CMM returned a "Required Action" Response |
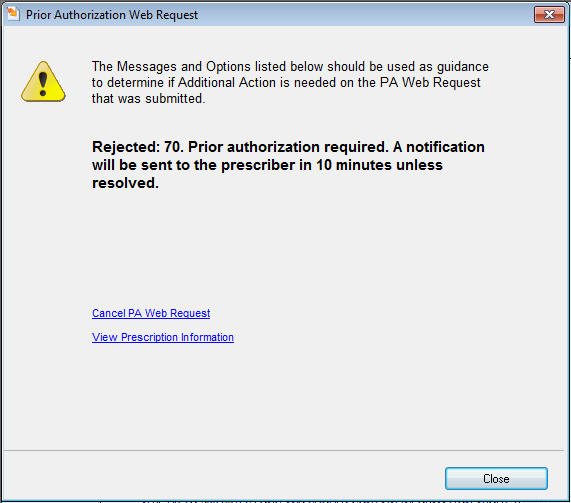
When the user clicks the PA Web Request button from the Claim Rejection Detail screen, the Prior Authorization Web Request window displays with a CMM response message and actions.
Added the ability to view controlled substances and the NarxCare Score at fill on the Patient Record
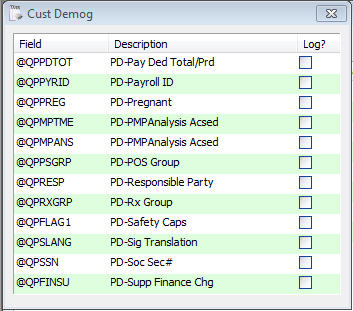
Added PMPAnalysis Acsed to the Customer Demographic Security Journal File.
Added PMP Analysis Access flag to Store Control, Security Access, Manage Employees. The option displays under Pharmacist/Technician Security Rights, Patient Access. Set up the Pharmacist Identifier and Qualifier.
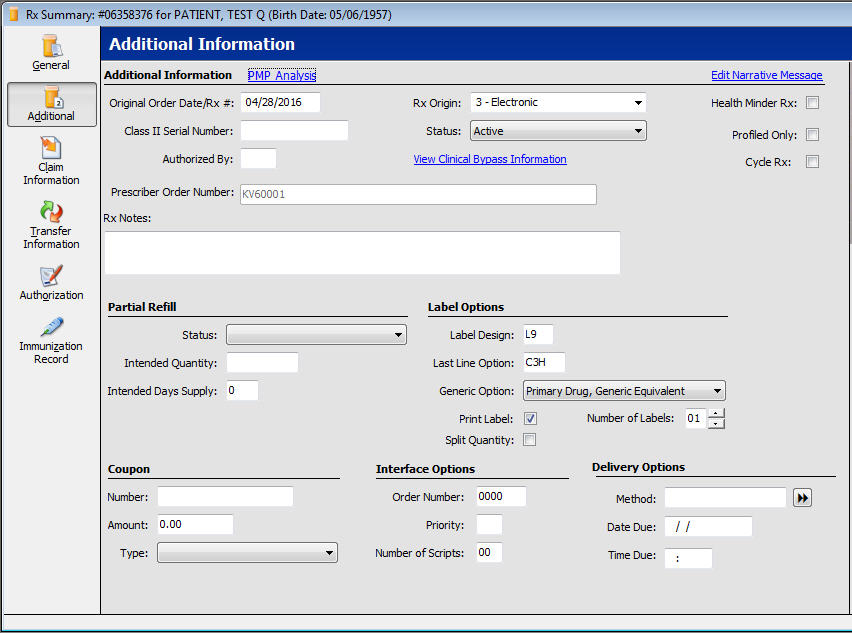
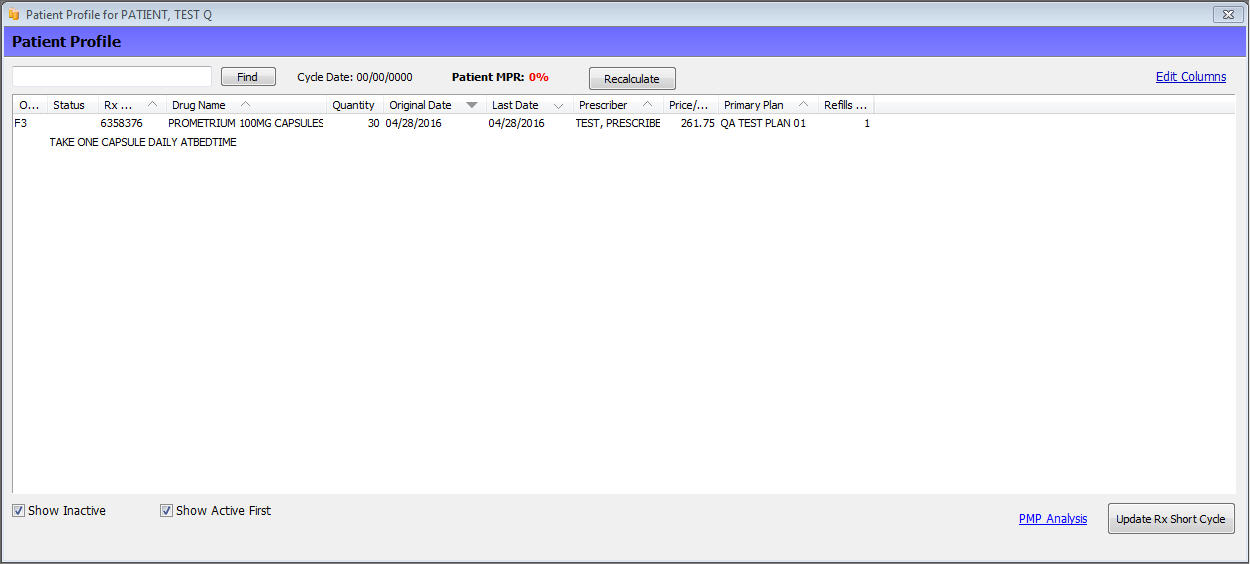
Added a PMP Analysis hyperlink to the Patient Profile window. Also added a PMP Analysis hyperlink to Rx Summary, Additional information screen. The hyperlinks are used to access Appriss® Gateway via a secure login. The Web Services Gateway® must be set up with the user's ID and Password for Appriss. NOTE: If the user tries to use one of the PMP Analysis links, but Web Services Gateway has not been set up with the Appriss portal, a green message bar displays Web Services Gateway is not configured to use this. If the user tries to use one of the PMP Analysis links, but the credentials in Web Services Gateway are blank or the login to Appriss fails due incorrect credentials, a window displays with the message PMP Analysis login not successful. Please verify User ID & Password settings in the Web Services Gateway.
Once Appriss is successfully signed into, the application will attempt to match a customer record on their site using Patient Demographic Information. If the patient is not found in Appriss, the following message displays: Patient was not found. Either patient information did not match or there is no information available for this patient. Verify Patient First Name, Last Name, Date of Birth and Zip Code are correct.
When a patient match is found and the information is retrieved from Appriss, a new windows displays on top of the Rx (Patient) Profile or Prescription Record. There will be multiple API calls to Appriss to pull the information. The first API call pulls NARxSCORES.
NOTE: If a technician is given Security Rights to perform PMP Analysis checks, when the action is performed, a Pharmacist Login prompt displays.
Added the ability to send a Multi SIG up to 140 characters
Added the ability for specific employees to view the entire Social Security number. Otherwise, all numbers are masked except the last 4 digits
Added View Full Social Security Number flag to Store Control, Security Access, Manage Employees. The option displays under Pharmacist/Technician Security Rights, Patient Access. The option default is checked for all existing employees. The option default is unchecked for new employees.
If an employee has the View Full Social Security Number Security Access Flag checked and the SSN field on the Patient Record is populated (masked number except the last four digits), the SSN label displays as a blue link. Once the link is clicked, the Social Security Number window displays. NOTE: If the employee doesn't have access or the SSN field is not populated, the SSN field displays as it did previously.
Users may edit a Social Security Number from either the SSN field on the Patient Record or the Social Security Number window.
Modified all reports that print the Social Security Number to only print it masked. Third-party forms will continue to display the full Social Security number.
Added the ability to interface with Concordance Health SMARxT™ Caps
Created an Authorization Flag called SmartRx Interface.
Added a Compliance Pkg field to the Patient Record, Additional Info screen. Also added this field to the Patient Batch Record Update screen. The field is defaulted to unchecked. If the field is checked, the application will interface with SMARxT.
Added Pat Compliance Pkg Label Routine. If Pat Compliance Pkg is in the label design, print Comp Pkg if Compliance Pkg is checked on the Patient Additional Information screen. If Pat Compliance Pkg is in the label design, do not print Comp Pkg if Compliance Pkg is unchecked on the Patient Additional Information screen.
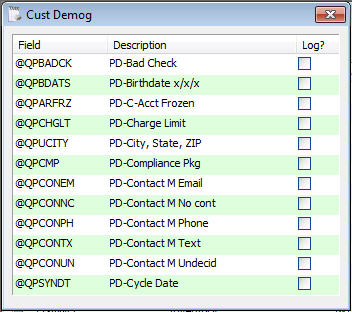
Added Compliance Pkg to Customer Demographic Security Journals. If a change is made to the Compliance Pkg field and the field is set to log, an entry is made in the Security Journal.
Users Authorized for DocuTrack - Implemented direct client to client communication that access eRx messages
Created a direct DocuTrack Client to QS1 VB Client comm connection. When the DocuTrack Client initiates the Load NCPDP Message function, a direct search starts. If a record match is made, the type of message determines how the process proceeds. If a record match is not found the following message displays: Matching E-Prescribing Message Not Found.
Created a direct DocuTrack Client to QS1 VB Client comm connection. When the DocuTrack Client initiates the Load NCPDP Message function, a direct search starts. If a record match is made, the Prescription Record displays. If a record match is not found, the following message displays: Matching Prescription Not Found.
Created a direct DocuTrack Client to QS1 VB Client comm connection. When the DocuTrack Client initiates the Load NCPDP Message function, a direct search starts. If a record match is made, the Patient Record displays. If a record match is not found, the following message displays: Matching Patient Not Found.
Users Authorized for DocuTrack - Modified the document association process
When the user clicks the Documents button, the system checks for prior associated documents. If there are none, the systems reads the Docutrack defined Document Type and attempts to match it to a Document Description for that type of record. If a match is not made, save the document type as a new Document Description for that record. Then the user must make the association to that document with that Document Description. If a match is made, make the association to that document with that Document Description. If there is no defined Document Type in DocuTrack, the application displays the list of Document Descriptions for that record.
If there are associated documents when the user clicks the Documents button, the Documents Available scan displays.
Users Authorized for QS/1 Document Management (QDM) with the Enable Fax Server option checked on the Documentation Management Interface Options window - Added the ability to view the status of faxes from the Fax Log
Modified the system to send a command to the QDM Client to automatically launch itself and navigate to the Outbound Fax Log when the Fax Log button is clicked on the Rx Processing Tasks bar. If the QDM Client is not running, the system sends a launch command and populates the QDM Login window. NOTE: If the terminal does not have QDM loaded, the following message displays: The QDM Client is not currently loaded on this terminal. Please install the QDM Client and try again.
If the user is operating on one monitor, the QDM Outbound Faxes window displays beside or on top of the NRx Client window. If the user is operating with two monitors, the QDM Outbound Faxes window automatically displays on the opposite monitor in which NRx is displayed.
Added the ability to fax a refill request from NRx through QDM
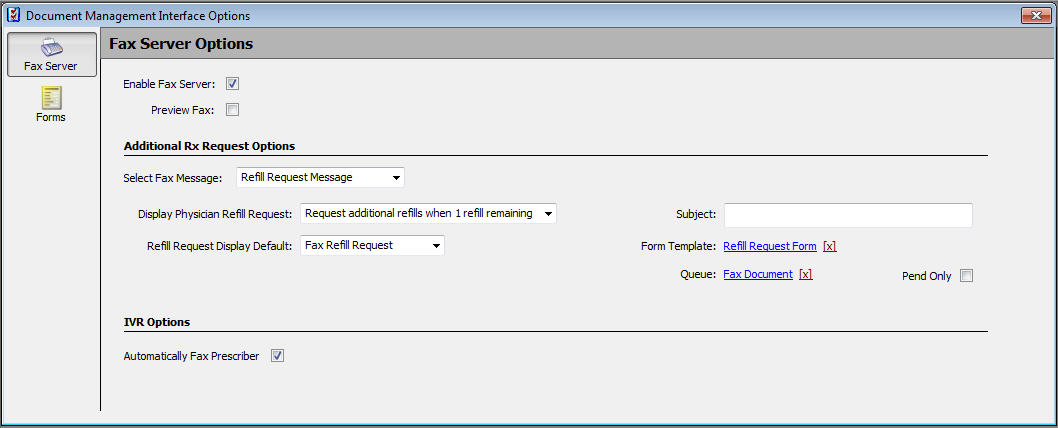
Added a hyperlink to the Document Management Interface field on the Store Control, Store Level Options screen, when QDM is authorized. Once the link is clicked, the Document Management Interface Options window displays. NOTE: If QDM is not authorized but another Document Management Interface is, the field only displays as a checkbox. If QDM and no other Document Management Interface are authorized, the field does not display at all.
Disabled QS1Fax fields on the Store Level Options, Additional Rx Request screen and the Automatically Fax Prescriber option on the Store Level Options, Doctor Fax/IVR screen when Enable Fax Server is checked on the Document Management Interface Options window.
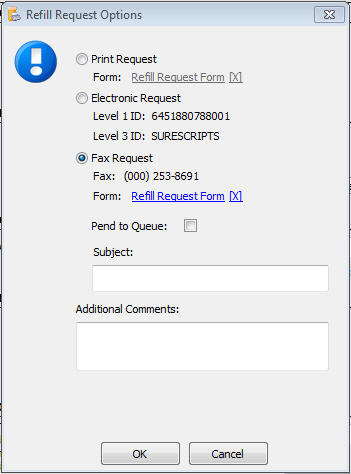
Modified the Refill Request Options window. The order of the items that display is now Print Request, Electronic Request and Fax Request. The following fields were added:
The Form hyperlink defaults to the form designated in the Store Level default depending on which REFREQ Type needs to be pulled. Once clicked, the API is called to display the available forms in QDM. Select the form and click OK. The system sends the Rx information to QDM to complete the Request Form and prints the form to the default printer on QDM.
If Pend to Queue is checked, a completed Fax Form is sent to the Default Fax Queue specified in Store Level Options.
The fax Subject field defaults to what is saved in Store Level Options. The field accepts up to 20 characters.
The Additional Comments field accepts up to 50 characters.
NOTE: If the Fax Request radio button is not selected, all fax-related fields are inactive. The Fax Subject Line and Additional Comments fields only display when Pend to Default QDM Fax Queue Only is checked.
Added the ability for IVR auto Refill Requests to use QDM
If Enable Fax Server is checked on the Store Level Options, System, Document Management Interface Options and Automatically Fax Prescriber is checked on the Store Level Options, Doctor Fax/IVR screen and the Prescriber Record has the Fax field populated, the system will automatically Queue Fax for sending in QDM. The system sends the Rx information to QDM via the API, and QDM completes the Defaulted Request Form specified in Store Level Options, System, Document Management Interface Options for whichever type of REFREQ the request is for (Refill Request Message, Emergency Class 2 Request, Class 2 Continuation Request, Class 3-5 New Rx Request). When this process is completed, the system creates a record in the QDM Outbound Fax Log with all the Information (Default Subject Line, Prescriber Name, Fax Number, and Default Cover Page), and the fax is queued for Sending. The completed Request Form is also saved and assigned to the Default Queue defined on the Document Management Interface Options window.
Created an API for FDS Engage to push data back into NRx
Created an Authorization flag for FDS Engage.
Added the following option to the Patient Record in the View drop-down list, if the FDS Engage authorization is turned on: MTM & Other Measures. Click the option to send an API call to Engage. If the patient exists in the Engage database, a MTM & Other Measures window displays with patient demographic information and the opportunities available for the patient. If the patient does not exist, an error message displays. If there is an error communicating with Engage, an error message displays.
Created Label Routines that allow additional characters for transaction acquisition, price, and quantity values
| Number | Routine |
| 790 | Specialty MTD ACQ (10) |
| 791 | Specialty MTD Price (9) |
| 792 | Specialty MTD Quantity (12) |
Created Label Routines that allow users to print HOA Only and Frequency Only from the Patient Record
| Number | Routine |
| 788 | Rx HOA |
| 789 | Rx Frequency Code |
Created a Label Routine to allow the patient's IVR Callback Number to print
| Number | Routine |
| 793 | IVR Callback Number |
Created a Label Routine for the Medical Record Number (MRN)
| Number | Routine |
| 794 | MRN |
Modified the system to change the base age for Beers drug to 65
Added the ability to discount a copay through Point-of-Sale
Added Allow POS Discount option on the Pay Plans, Additional Information screen.