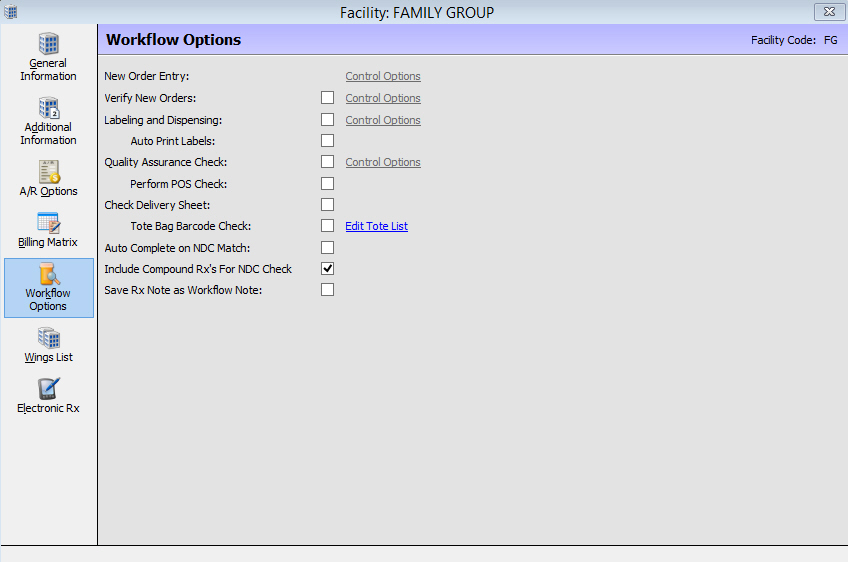
Use the Facility Workflow Options to control which workflow functions to turn on for a particular facility. Click the Control Options link beside a particular function to turn on various Clinical Checking options for the desired queues. Click the Edit Tote List link in order to add new wings for a facility.
 To
set up Control Options, first select the link beside the option you need
to set up; example: Verify New Orders. Click Save.
The Control Options link is then available.
To
set up Control Options, first select the link beside the option you need
to set up; example: Verify New Orders. Click Save.
The Control Options link is then available.
FACILITY RECORD/Workflow Options |
|
Field Name |
Field Definition |
| New Order Entry | Click the Control Options link to access the Clinical Checking Setup |
|
Select the clinical checking options to apply to new orders. |
| Verify New Orders | Determines if the pharmacist verification step of Workflow is operational. All new orders and their clinical issue are held in a queue to be verified by a pharmacist. |
|
Select the clinical checking options to apply to new orders. |
| Label and Dispensing | Determines how labels are processed within Workflow. If the option is not selected, labeling proceeds as it did prior to implementation of Workflow (click the Fill icon and the label prints). |
|
To activate this option, the Labeling/Dispensing box must also be selected. If Auto Print Labels is selected, the system prints labels according to the fill function that is used. The purpose of the option is to enable labels to automatically print when the drug order is adjudicated. If the system uses delayed labels and a fill and print function is used, the label prints automatically when the prescription has been adjudicated and paid as it would do outside of Workflow. If Auto Print Labels is off, the label with print through Label and Dispense queue. |
|
Allows a technician to scan the barcode on the stock bottle to verify the correct medication is used or counted. |
|
Enter the custom label design to be used when the NDC matches. Based on system settings, a lot number and expiration date prints on the label. QS/1 suggests creating a small label that can be used as a quality assurance sticker (typically used with bingo cards). |
| Quality Assurance Check | Determines if the quality assurance check is included in the process. If the option is selected, the final product is checked against the order on the screen. If using the Images and Imprints service, an image of the product displays on the screen. If using Rx Intake, an image of the drug order displays on the screen. |
|
Select
this option to prevent prescriptions that have not been processed
through QA from being checked out in Point-of-Sale.
This option only displays
if authorized for Point-of-Sale. |
|
Allows a technician to scan the barcode on the stock bottle to verify the correct medication is used or counted. |
|
Enter the custom label design for the system to print when the NDC matches. Based on the system setting, a lot number and expiration date window displays. Enter the lot number and expiration date. QS/1 suggests a small label that can be used as a quality assurance sticker. |
| Check Delivery Sheet | Determines
whether or not items are to be scanned for delivery.
When
this option is selected and items are scanned for delivery, a
delivery manifest may be printed for only those items that were
scanned. |
|
Determines whether the tote scanning step of the process is included. When the option is selected, the totes must be set up and tote labels printed. |
|
Double click a wing in the list or press the corresponding function key; the Delivery Totes window for the selected wing displays. Select the tote number and click Zebra Print from the icon toolbar. A tote label prints to be used when scanning totes through the delivery queue. |
| Auto Complete on NDC Match | Select this option to change the status to Complete after the NDC Verification. |
| Include Compound Rxs for NDC Check | This option prompts for an NDC check during Labeling and Dispensing and/or Quality Assurance. If the option is not selected, no NDC check is performed. |
| Save Rx Note as Workflow Note | This option allows Rx Notes to display in the Workflow Scan under the Note column. |
Return to Create a Facility Record