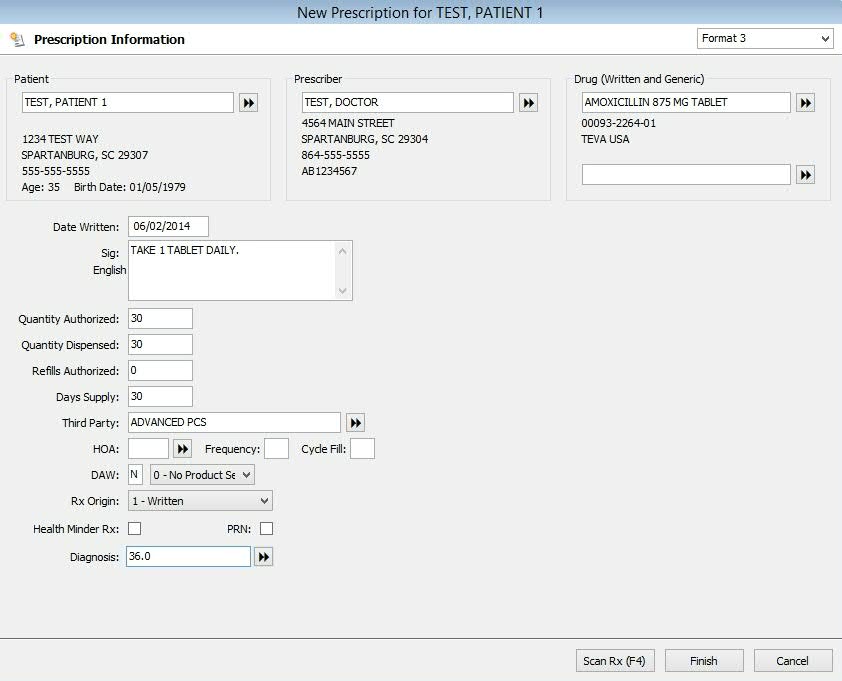
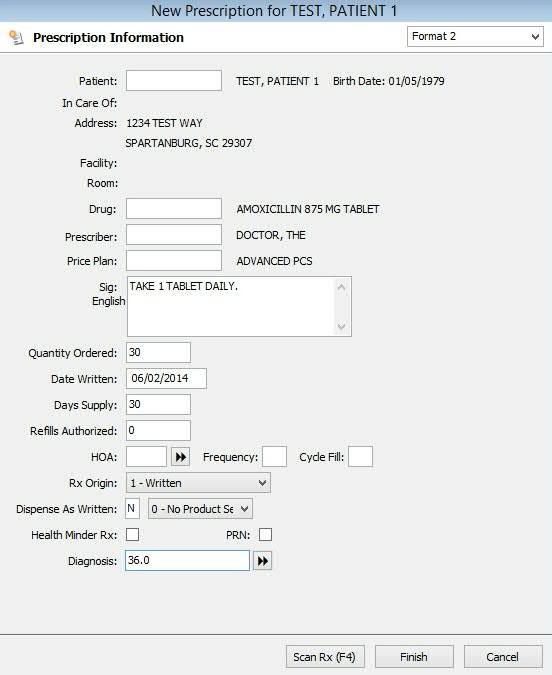
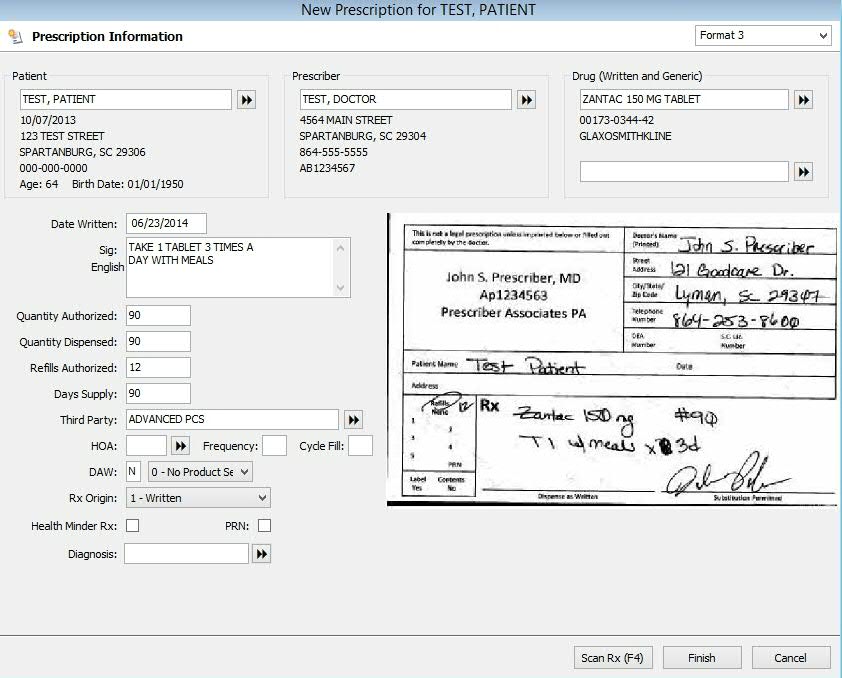
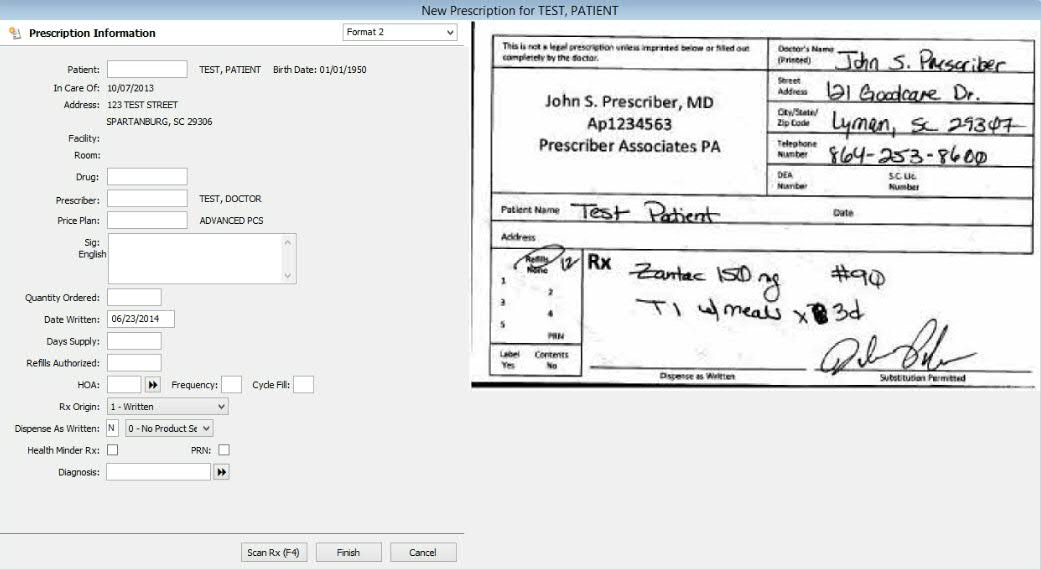
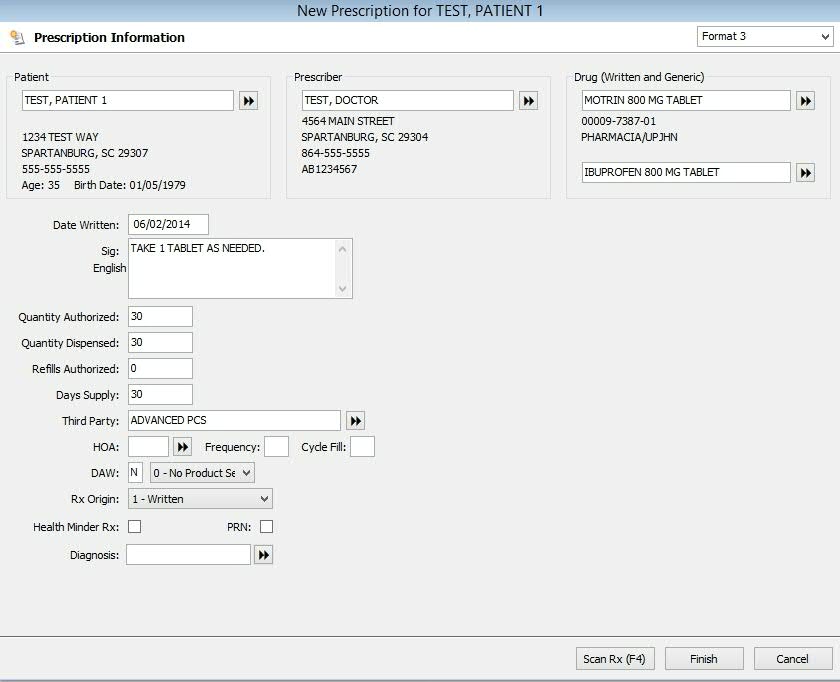
QS/1 offers multiple formats for new prescription entry. The formats are available via a drop-down list in the upper right corner of the new prescription screen. When a prescription is completed and the Rx Summary screen displays, the current format is saved as the user's default for future processing. Added the Diagnosis to all three formats.
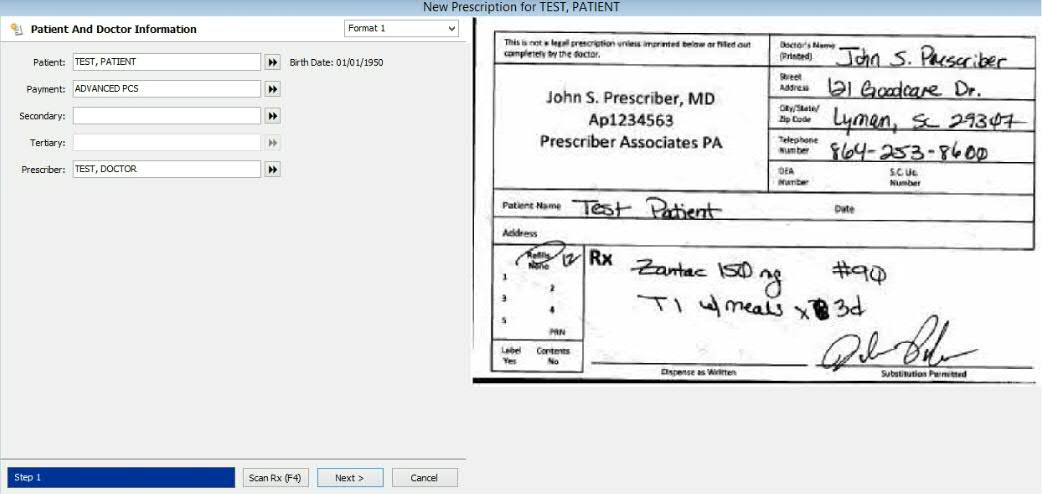
When a prescription is entered in any of the new formats, the option to scan the prescription image is available with a button, Scan Rx, at the bottom of the screen.
Added the ability to search for a generic drug for the prescription. Generics already linked to the drug pull in automatically when the drug is selected.
 Electronic prescriptions can only be processed using
Format 1. If you have selected another format as the default, it will
revert to Format 1 for an electronic prescription.
Electronic prescriptions can only be processed using
Format 1. If you have selected another format as the default, it will
revert to Format 1 for an electronic prescription.
Format 1 is used in the procedures below.
To fill a new prescription with the New Rx icon:
1. Access NRx.
2. Click ![]() on the Rx Processing
Tasks menu or press F2. The
Patient and Doctor Information screen displays:
on the Rx Processing
Tasks menu or press F2. The
Patient and Doctor Information screen displays:
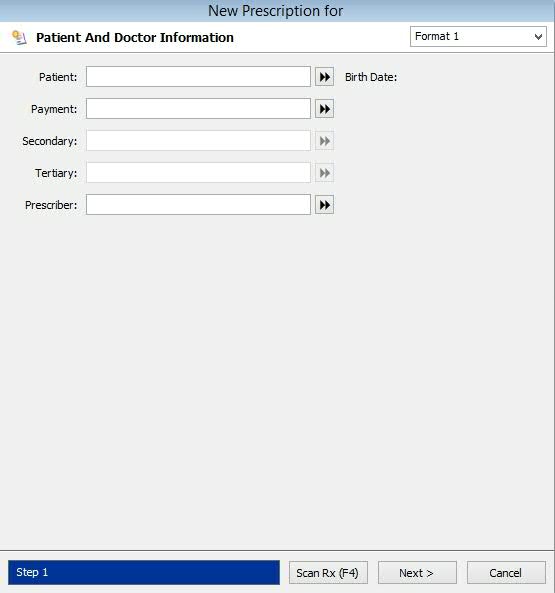
3. Type the patient name (last name, first name), phone number, birth date or Social Security number in the Patient field; press Tab. If the system does not find an exact match, the Patient Scan displays. Select the correct patient by double clicking the name or pressing the corresponding function key. To add the patient, click the New Patient icon on the main menu bar or press CTRL+N.
4. Type the Price Plan name or BIN in the Payment field or click the arrows to the right of Payment to select a plan from the Price Plan scan. Select the correct plan by double clicking the name or pressing the corresponding function key. Press Tab. If the Patient Record has a Price Plan attached, it automatically defaults in this field when the patient is selected. If this field is left blank, it defaults to the Primary Price Plan on the Drug Record.
5. Select Secondary/Tertiary Payment Plan if needed. Press Tab.
6. Type the prescriber name (last name, first name), DEA Number or State License Number in the Prescriber field; press Tab. If the system does not find an exact match, the Prescriber Scan displays. Select the correct prescriber by double clicking the name or pressing the corresponding function key. To add the prescriber, click the New Prescriber icon on the main menu bar or press CTRL+N.
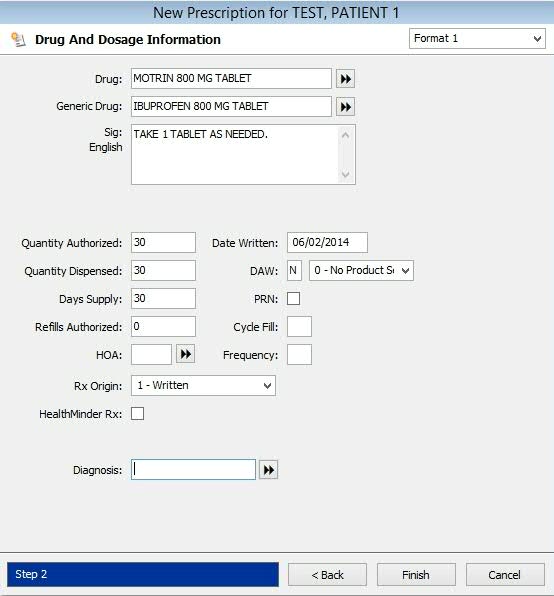
7. When the prescriber information is correct, click Next. The Drug and Dosage Information screen displays:
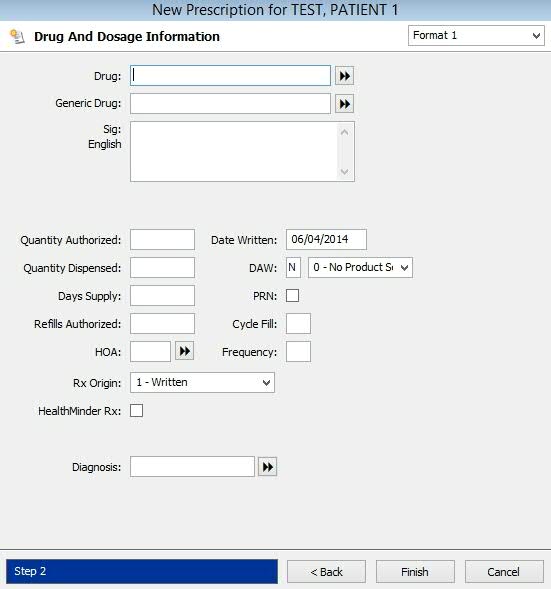
8. Type the drug name in the Drug field or type/scan the Drug NDC Number from the stock bottle; press Tab. If the system does not find an exact match, the Drug Scan displays. Select the correct drug by double clicking the name or pressing the corresponding function key. To add the drug, click the New Drug icon on the main menu bar or press CTRL+N.
9. When the correct drug is selected, press Tab.
If a generic drug is linked to
the brand drug, the generic drug automatically displays.
10. If a default SIG is attached to the Drug Record it automatically displays. If not, type the SIG. The SIG may be codes, free text or a combination of both. Press Tab.
When entering SIG codes, put a space between codes
unless using Prebuilt SIGs (i.e., Take 1 Capsule by Mouth Every Day =
TIC PO QD).
The SIG on a new prescription is affected if the Update SIG Dosage Form With Drug Unit field in Store Level Options/Rx Filling is checked. If SIG is entered by code, the SIG builder or free text, the unit entered is compared to the Drug Record. If the SIG and the unit do not match, the unit type is replaced.
If the Create Customized SIG for Prebuilt SIG field in Store Level Options/Rx Filling is not checked, the error message SIG Dosage Form Unit Does Not Match Drug Unit displays. Click OK to go to the Prebuilt SIG Scan to choose a Prebuilt SIG. If Create Customized SIG for Prebuilt SIG field is checked, a new customized SIG code is created with the correct unit.
11. Type the Quantity Authorized followed by a slash and the number of times per day the drug is to be taken. After entering this information, the Quantity Dispensed and the Days Supply automatically populate.
12. Type the number of Refills Authorized.
13. If the HOA/Frequency is not attached to a Prebuilt SIG, select the code and frequency from the scan. If the HOA/Frequency are attached to the SIG, the fields automatically populate.
14. Select the Rx Origin from the drop down.
15. Check the Health-Minder Rx box, if applicable.
If the Health-Minder option on the Patient Record,
Additional Information screen is checked, this field is automatically
checked.
16. Select the Diagnosis Code from the scan. The Date Written automatically defaults to today's date.
17. Check DAW, if needed. If DAW is checked, select the NCPDP value from the drop-down list.
18. If PRN is checked, the system refills as needed until a Rx Life or Stop Date are encountered.
Customers
using NRx with the Nursing Home Module, click Cycle
Fill for additional information.
19. When all required information is entered, press Enter or click Finish. The Rx Summary General Information screen displays:
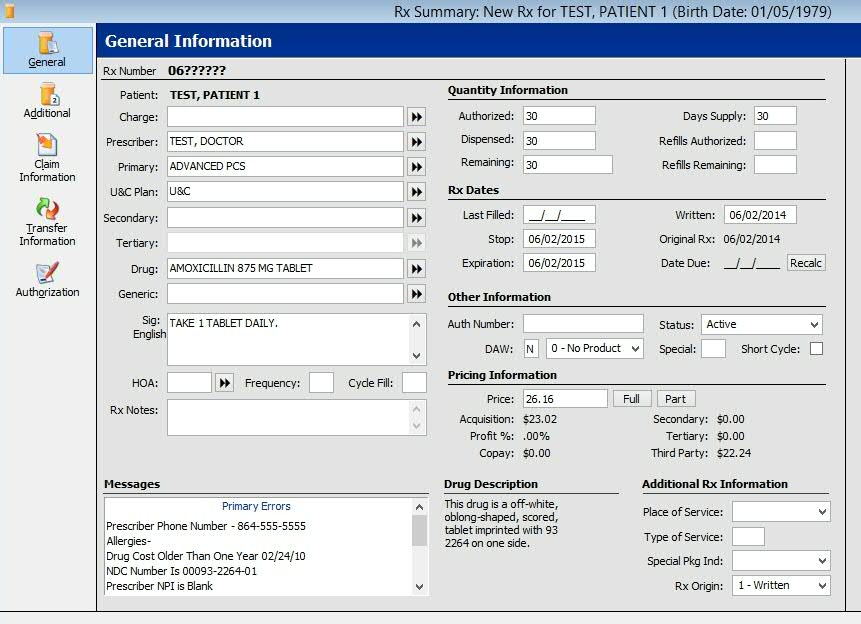
Review the Prescription Record vertical icon bar
functions.
20. If the prescription is correct (error messages do not display),
press Enter or click ![]() to display the Filling Options and Delivery Options:
to display the Filling Options and Delivery Options:
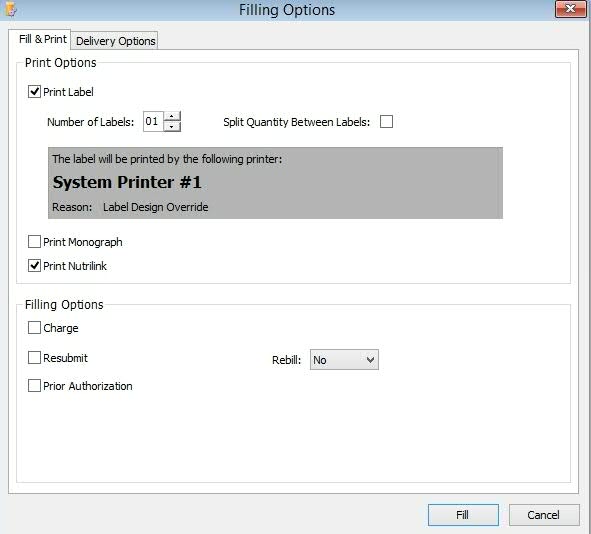
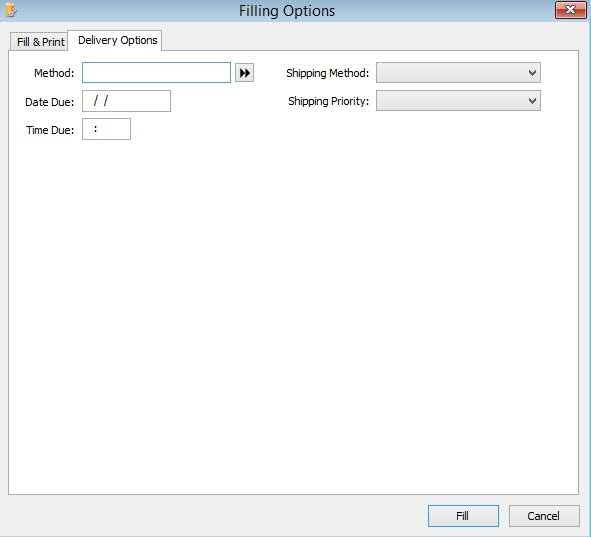
21. Select the appropriate options and click Fill or press Enter to fill the prescription.
Return to Fill a New Prescription