To access Store Level Options/Fastclaim:
1. Click Store Control, Store Level Options.
2. The Store Level Options/Systems window displays:
3. Click ![]() on the vertical icon bar. The Fastclaim Options window displays:
on the vertical icon bar. The Fastclaim Options window displays:
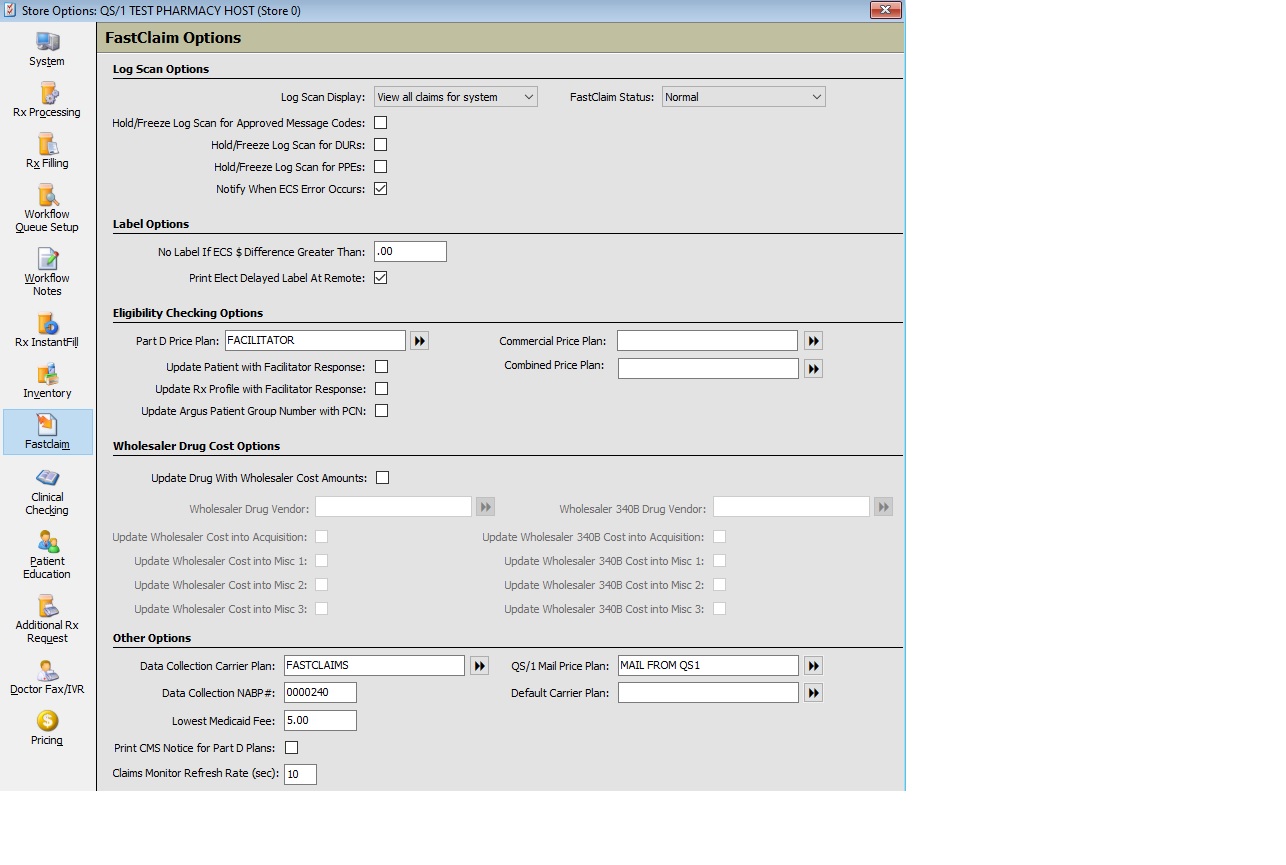
4. Use the definitions below to determine how to set the options:
| STORE CONTROL | |
| STORE LEVEL OPTIONS/FASTCLAIM | |
| Log Scan Options | |
| Field Name | Field Definition |
| Log Scan Display | Select claim viewing options from the drop-down: • View claims for terminal only • View all claims for system • View claims for store only |
| Hold/Freeze Log Scan for Approved Message Codes | If this option is checked, the user is unable to scroll to the next page of claims until all claims on the displayed screen with approved messages have been viewed. |
| Hold/Freeze Log Scan for DURs | Check this option to freeze the scan until DURs have been reviewed. If left unchecked, the pharmacist can escape the scan even if DURs exist. |
| Hold/Freeze Log Scan for PPEs | Check this option to freeze the scan until Pre/Post Edits have been reviewed. |
| Notify When ECS Error Occurs | Check this option to display ‘Rejected or Failed Claim, Check Logscan’ when there is an ECS failure or rejection. This message displays on the Rx Processing Tasks screen. |
| Label Options | |
| No Label If ECS $ Difference Greater Than | Type a dollar value so that when the system encounters this amount as a difference between the cost of a drug submitted and the cost of the drug supplied by the claims processor, the prescription label does not print even thought the prescription is filled. |
| Print Elect Delayed Label At Remote | Check this option to print electronic delayed labels at the remote stores from the host store. NOTE: A pre-established modem connection to the remote store must be in place. |
| Eligibility Checking Options | |
| Part D Price Plan | Select the double arrows to select the Part D Price Plan. |
| Update Patient with Facilitator Response | Check this option to automatically update patient payment information with the eligibility response received from the facilitator. This option updates the price plans in order until a PDP is not found. If only the secondary and tertiary are present, updates are not performed on either the patient insurance or Rx profile because of the missing primary PDP. |
| Update Rx Profile with Facilitator Response | Check this option to automatically update the prescription profile with the facilitator response. If unchecked, the patient profile can be updated by clicking the Update Profile icon on the Payment Information screen. |
| Update
Argus Patient Group Number with PCN
|
Check this option to update the insurance group number field with the PCN that was received in the eligibility response. The group number is appended to the end of the PCN number. |
Commercial Price Plan |
Select the double arrows and select the Commercial Price Plan from the scan. |
Combined Price Plan |
Select the double arrows and select the Combined Price Plan from the scan. |
Wholesaler Drug Cost Options |
|
| Update Drug With Wholesaler Cost Amounts | Check this option to update ACQ Cost from the wholesaler via Daily Price Updates and via claim responses from PowerLine. |
| Wholesaler Drug Vendor | Select your vendor from the Vendor Record scan. Before setting up for vendor cost updates, contact the vendor to determine if they participate in this program. |
| Update Wholesaler Cost into Acquisition | Check this box to populate wholesaler cost into the Acquisition field. |
| Update Wholesaler Cost into Misc 1 | Check this box to populate wholesaler cost into the Misc 1 field. |
| Update Wholesaler cost into Misc 2 | Check this box to populate wholesaler cost into the Misc 2 field. |
| Wholesaler 340B Drug Vendor | Select your 340B vendor from the Vendor Record scan. |
| Update Wholesaler 340B Cost into Misc 1 | Check this box to populate 340B cost into the Misc 1 field. |
| Update Wholesaler 340B Cost into Misc 2 | Check this box to populate 340B cost into the Misc 2 field. |
| Update Wholesaler 340B Cost into Acquisition | Check this box to populate 340B cost into the Acquisition field. |
| Other Options | |
| Data Collection Carrier Plan | Click the arrows and select the user-defined Data Collection Carrier Plan from the Price Plan Scan if transmitting for IMS polling. |
| Data Collection NABP# | Type your NABP# if transmitting for IMS polling. |
| Lowest Medicaid Fee | Type your lowest Medicaid fee. If a third party reimburses a fee lower than this amount, a warning displays in the ECS log or on a label if the routine is implemented. |
| Print CMS Notice for Part D Plans | Check
this option to automatically print the Centers for Medicare and
Medicaid Services (CMS) Notice of Appeals Right Form with a rejection
code of 569 or an approved message code of 018.
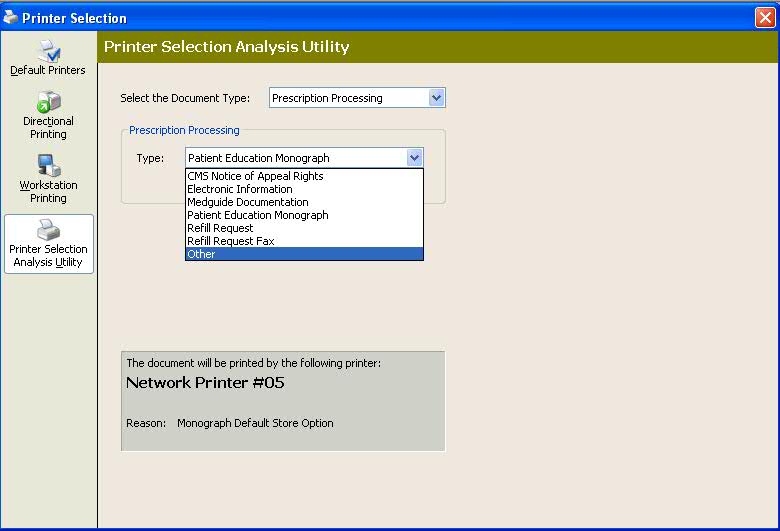
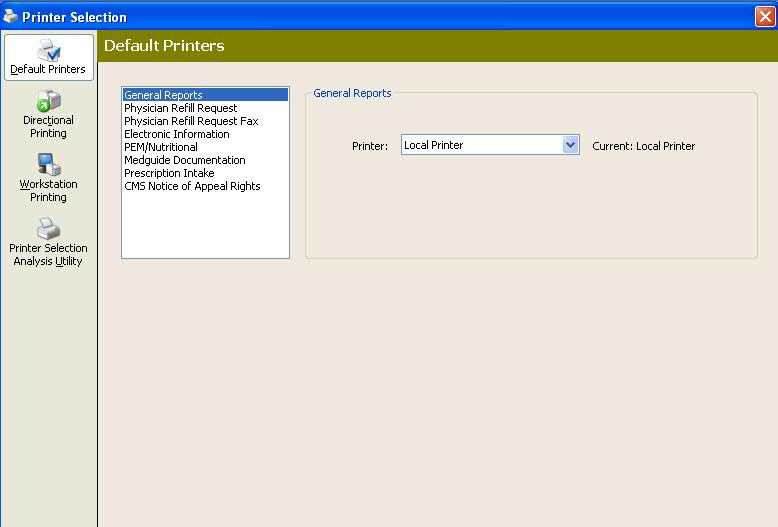
There is also an option to manually print the CMS notice from the Claim Payment Detail and Claim Rejection Detail screens. A default printer can be designated for the CMS Notice. A CMS Notice of Appeal Rights was added to the list for Prescription Processing when using the Printer Selection Analysis Utility so that the form prints just like patient monographs print.
The patient's name, drug description and Rx number populate on the CMS notice. The system automatically checks the Language field on the Patient Record to determine whether to print an English or Spanish version of the form.
Patients in long-term care pharmacies are exempt from the CMS Notice requirements.
A CMS Notice is printed for each drug in a compound prescription that returns with a rejection code of 569 or an approved message code of 018. |
| QS/1 Mail Price Plan | Click the arrows and select the price plan to process electronic e-prescribing. This price plan must have the NCPDP# as well as the carrier. |
| Default Carrier Plan | Click the arrows and select the default carrier plan for the system (usually PowerLine). |