 The QS/1 Windows Client must be running when the
reports are set to run.
The QS/1 Windows Client must be running when the
reports are set to run.The Report Scheduler is used to automatically run selected reports at a specific time each day. QS/1 suggests that reports be set to print at the close of business, but prior to the nightly backup.
The QS/1 Windows Client must be running when the
reports are set to run.
Report Select/Sort/Print Options cannot be changed from the Report Scheduler.
Saved reports can be selected to run through the Report Scheduler.
Scheduled reports are saved on a per User ID, per workstation basis.
Scheduled reports can only be viewed from the workstation where configured.
If the designated printer is not ready, scheduled reports are held in queue until the printer is ready.
To schedule reports through the Report Scheduler:
1. Click Store Control, Report Scheduler. The Report Scheduler displays:

2. Click ![]() to create a new report for the Report Scheduler. The New Scheduled Report
displays:
to create a new report for the Report Scheduler. The New Scheduled Report
displays:
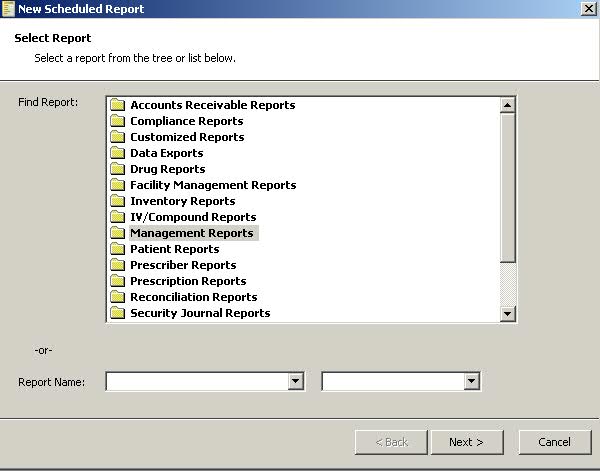
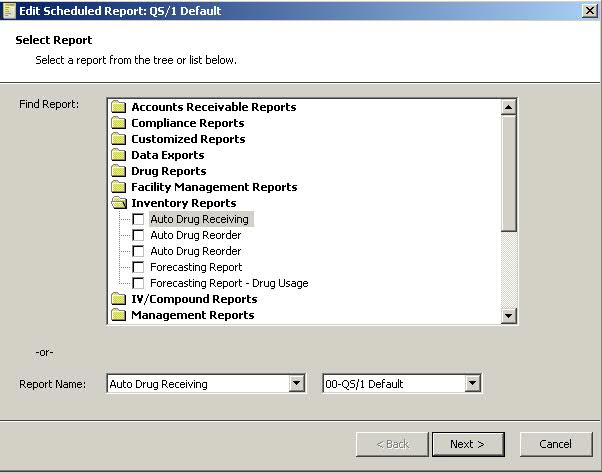
3. Click the folder next to the report group to display the available reports, or select a report from the Report Name drop-down. If you have saved reports, move to the field to the right of the Report Name field and click the drop-down to select a saved report:
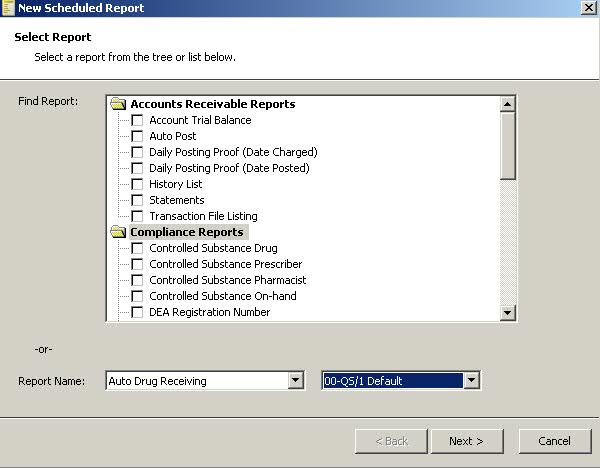
4. After selecting the
report to schedule, click  .
The report run date, time, frequency and printer selections display:
.
The report run date, time, frequency and printer selections display:
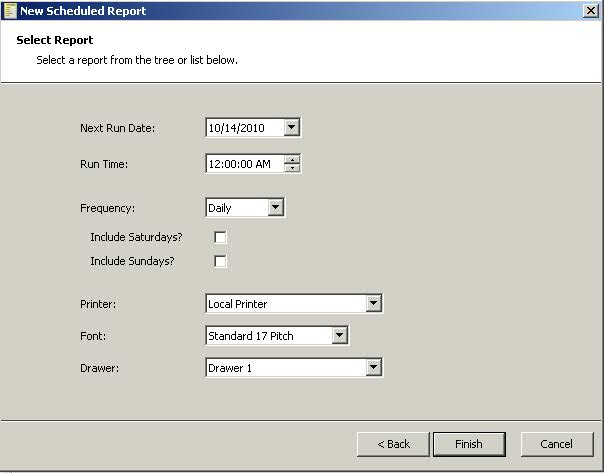
 Each time a report is printed via the Report Scheduler, the system automatically
increments the Next Run Date based on the Frequency selected.
Each time a report is printed via the Report Scheduler, the system automatically
increments the Next Run Date based on the Frequency selected.
5. Complete the fields
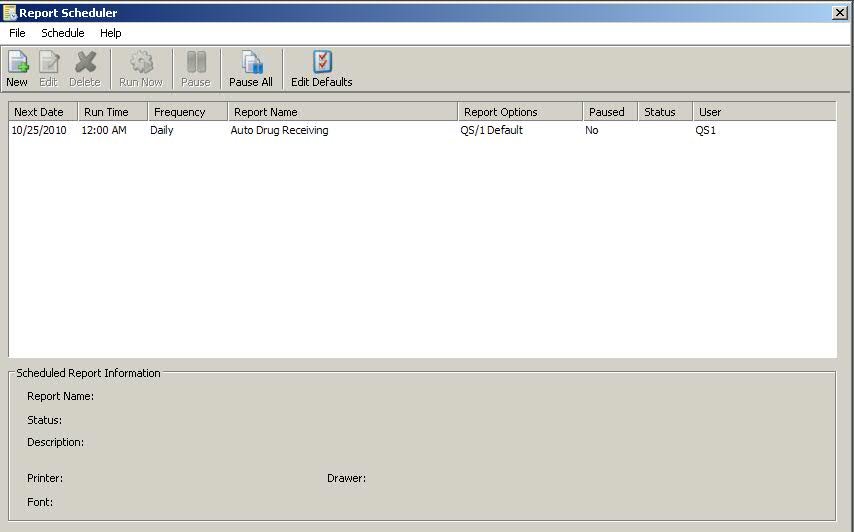
above and click  . The Report
Scheduler displays the report that was scheduled to run:
. The Report
Scheduler displays the report that was scheduled to run:
To edit a report through the Report Scheduler:
1. To edit a Scheduled
Report, select the report and click ![]() .
The Edit Scheduled Report displays:
.
The Edit Scheduled Report displays:
2. Edit options include selecting a different report, changing the run date, time and frequency, and chancing printer selection.
3. Make changes and click
.
4. To edit Report Scheduler
Defaults, click  .
The Defaults display:
.
The Defaults display:
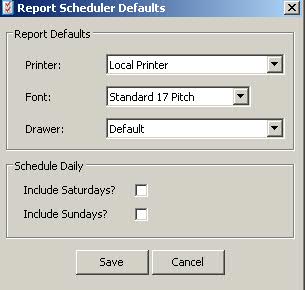
5. Make changes and click
![]() .
.
To pause report printing through the Report Scheduler:
1. From the Report Scheduler,
select the report to pause. Click ![]() .
.
2. To pause printing
for all reports in the scheduler, click ![]() .
.
3. To resume printing,
click ![]() or
or  .
.
To delete a report from the Report Scheduler:
1.
From the Report Scheduler, select the report to delete. Click ![]() .
.
After flagging the report for deletion,
you must compress the Scheduled Reports File in System Utilities/Master
File Maintenance to physically remove the report from the Report Scheduler
List.
Return to Set Up Store Control Options