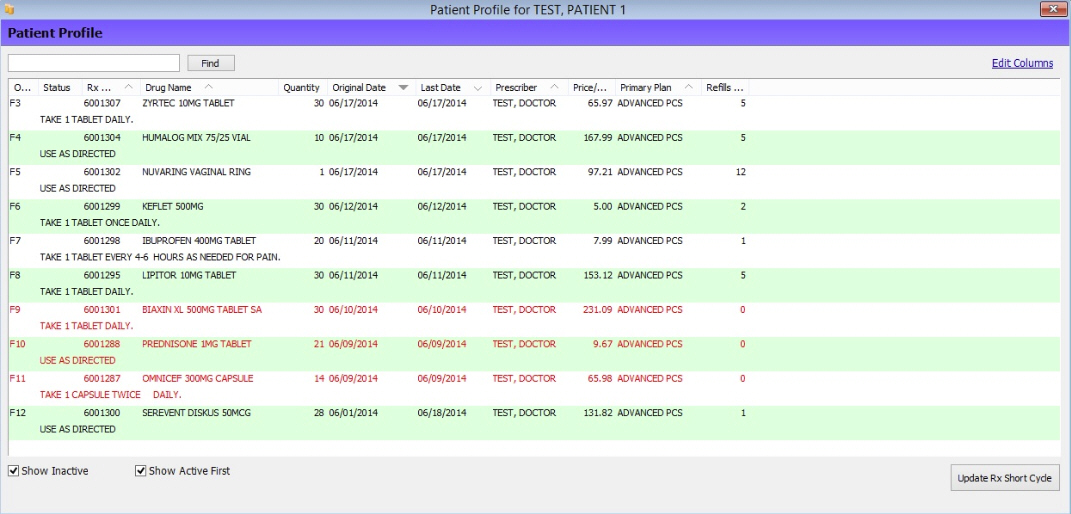
The two methods for transferring prescriptions are from store to store or from patient to patient. The patient-to-patient transfer is used most commonly when the prescription was filled for the wrong patient during the initial filling process. The store-to-store transfer is typically used for patient convenience.
The system logs pharmacist/technician and date/time for both incoming and outgoing transferred prescriptions. The date/time does not change once the transfer function is used for both incoming or outgoing prescriptions. The pharmacist/technician that is logged in auto populates once Save is selected. For an incoming prescription, this is the receiving pharmacist/technician; for an outgoing prescription, this is the transferring pharmacist/technician.
Transfer a Prescription from Patient to Patient
1. Access PrimeCare.
2. Access the Patient Record that you are transferring the prescription FROM.
3. Click ![]() to access the patient's
prescription profile:
to access the patient's
prescription profile:

4. Highlight the prescription to transfer. Click ![]() .
The Patient Scan displays:
.
The Patient Scan displays:

5. Select the patient to transfer the prescription TO. Double-click the patient. The transfer is complete.
Transfer a Prescription from Store to Store
1. Access the Patient Prescription Record for the prescription to transfer.
2. Click
![]() . The
Transfer Information screen displays Outgoing
Transfer Information.
. The
Transfer Information screen displays Outgoing
Transfer Information.
3. For Outgoing Transfers, complete the Pharmacy and Pharmacist information. Click the arrows next to Pharmacy Name. If the pharmacy to transfer to is listed, double-click that pharmacy and the pharmacy information automatically populates.
4. If
the pharmacy is not listed, click ![]() ,
enter the data and click Save.
When all information on the screen is complete, click Save.
,
enter the data and click Save.
When all information on the screen is complete, click Save.
4. The outgoing transfer is complete.
5. For Incoming
Transfers, create the prescription. Prior to filling the prescription,
click ![]() on the Patient Prescription Record. The Incoming
Transfer Information screen displays. Complete
the information on the screen. Click Save.
on the Patient Prescription Record. The Incoming
Transfer Information screen displays. Complete
the information on the screen. Click Save.
6. Click General on the vertical icon bar and fill the prescription as usual.
7. The incoming transfer is complete.
 Set the number of refills that can be transferred in Store
Level Options/Rx Filling Options.
The Transfer In/Out Date is system generated
once the Transfer Information screen is complete.
The Rx
Summary screen displays the following messages
based on Rx Transfer scenarios:
Type
01 in Refills Transferred in the Outgoing Transfer Window and Profiled RX with No Refills Authorized
displays.
Type
+ 1 (Initial Fill) in Refills Authorized if trying to transfer ALL
fills to another pharmacy and Profiled
RX with Refills Authorized displays.
There
is no more 'Initial Fill' and you need to transfer the number of refills
remaining, Transferring Refills between
Fills display only if the Number of Refills Transferred + Number
of Times Filled = Refills Authorized.
*NOTE: If you do not transfer the full amount of refills remaining,
the system does not display a message because technically there are
still fills remaining on the Rx at the pharmacy.
If
an Incoming Transfer prompts the Price Plan message, XXXX
Refills Transferred on XX/XX/XX, the prescription cannot
be filled until the Allow Fill Message = YES.
The store-wide hard stops of Rx Transferred to Another Store - Cannot Fill This RX and No Refills Remaining, prevent prescriptions from being filled if they transferred all Refills Authorized or Refills Authorized + 1 for Initial Fill if Profiled Rx.
Return to Common Prescription Processing Functions