Access and Set Up the Billing Matrix
Access the Billing Matrix
From the Facility
Record, click Additional Information
on the vertical toolbar; the Additional Information screen displays.
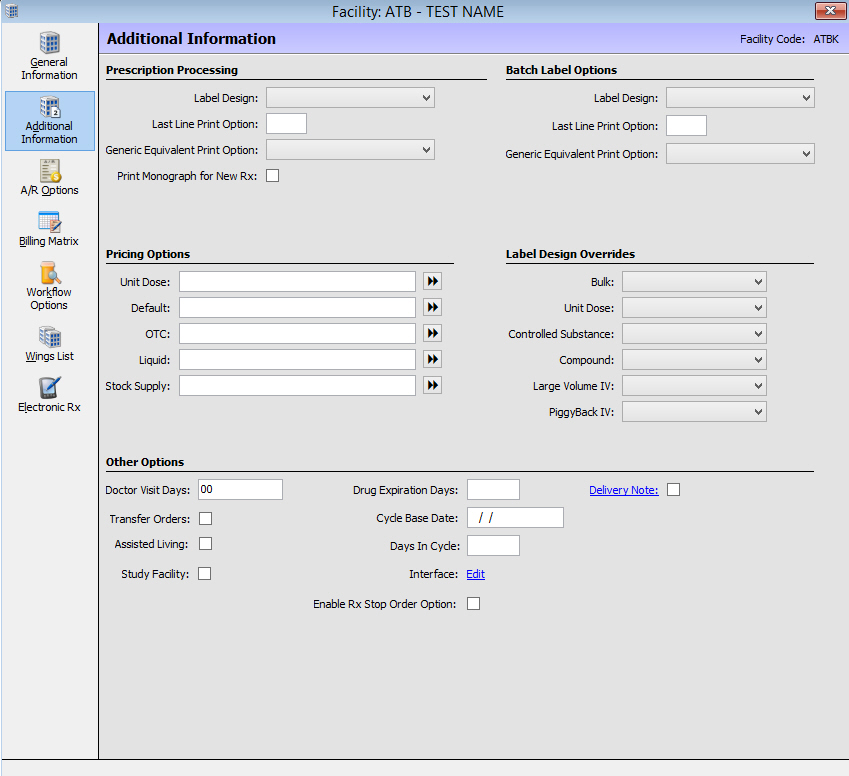
Ensure all Pricing
Options are blank. The Facility/Unit Billing Matrix replaces the Pricing
Options.
Click Billing
Matrix on the vertical toolbar. The Billing Matrix screen displays.
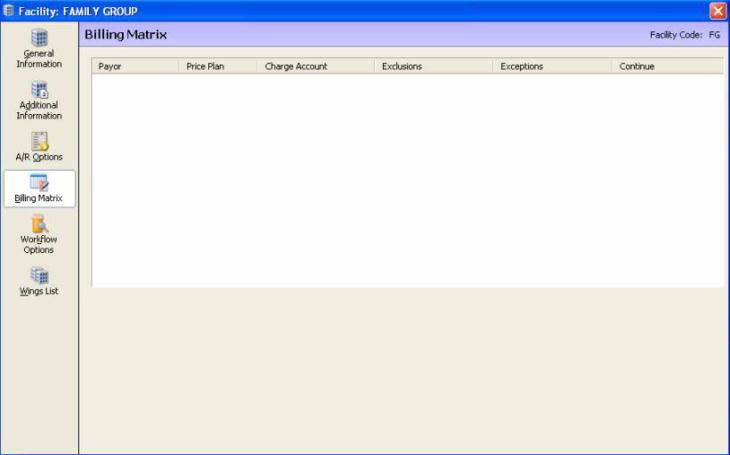
The Facility/Unit Billing Matrix has six columns. Payor,
Price Plan, Charge Account, Exclusions, Exceptions and Continue.
Click New to create a new
entry. Click Edit to modify
an existing entry.
Add a New Payor to the Facility Payor List
From the Billing
Matrix screen, click New.
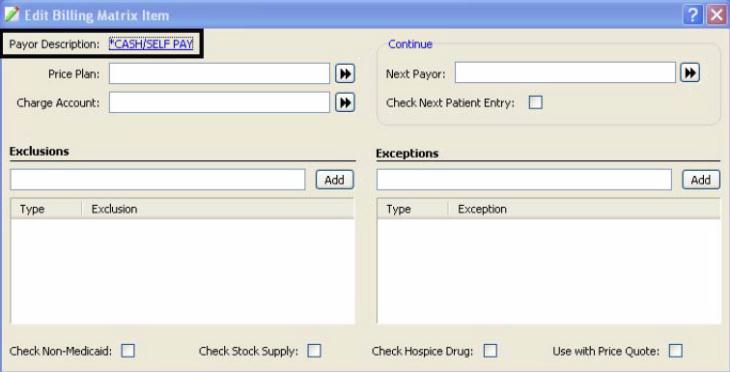
The Edit Billing Matrix Item window displays.

Click the Add Payor hyperlink;
the Payor List displays.
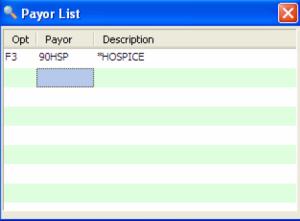
Use the Next icon
to proceed to the next page. Select a blank Payor field and type in
the Payor Code and Payor Description.
Click Save.
The system adds the new payor to the list.
To delete a payor
from the payor list, click the Payor and Description fields and clear
the information. Click Save.
Adding an Existing Payor to the Facility/Unit
Billing Matrix
Key Functions
Price Plan:
Price Plan to use; if left blank, the patient's Price Plan is used.
Charge Account: C-acct to use; if left
blank, the patient's c-acct is used.
Exclusions: Items to be excluded from
this payor.
Exceptions: Items that are exceptions
to the exclusions; they stay on this payor.
Continue: The payor that the exclusions
move to next.
From the Facility Billing Matrix,
click New; the Edit Billing
Matrix Item window displays.
Click the Add
Payor hyperlink; the Payor List displays.
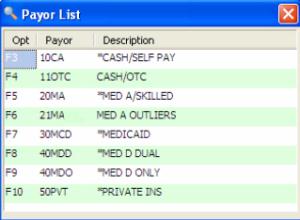
Press the corresponding function
key to add the Payor. The Payor Description displays.
Add the Price Plan, Charge Account,
Exclusions, Exceptions and Next Payor as needed. Click Save.
Return to Set up the Facility/Unit Billing Matrix