Added the new FDB Monograph Disclaimer:
Important: How to Use This Information
This is a summary and does NOT have all possible information about this
product. This information does not assure that this product is safe,
effective, or appropriate for you. This information is not individual
medical advice and does not substitute for the advice of your health
care professional. Always ask your health care professional for complete
information about this product and your specific health needs.
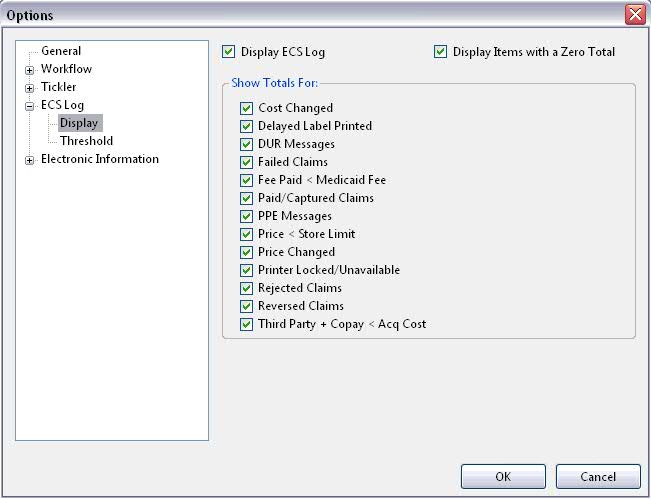
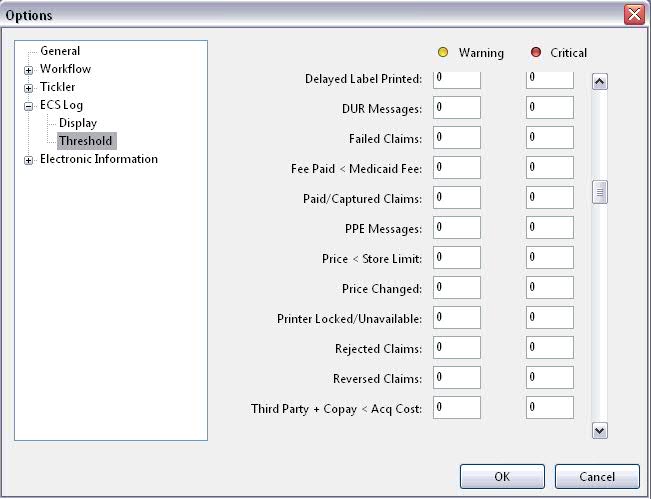
Added functionality to view extra status filters from the Electronic Claims Status (ECS) Log in Pharmacy at a Glance. Show Me. Added the option to set the Warning or Critical Threshold for the ECS Log. Show Me. The new status filter keys are:
Total Cost < Acquisition Cost
Cost Changed
Price Changed
Delayed Label Printed
Fee < Medicaid Fee
Price < Store File Limit
Printer Locked or Unavailable
Pharmacy at a Glance now displays the Store Name (or All Stores) and then Pharmacy at a Glance when accessed.
Price Plan Alias
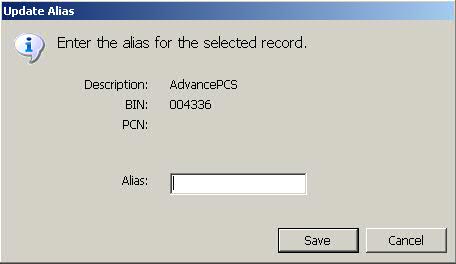
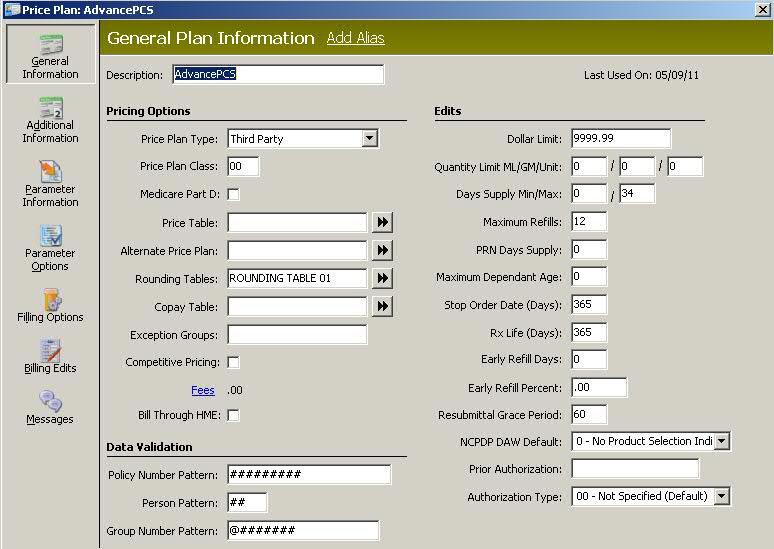
Added a feature to Price Plans which allows an alias to be entered. The Price Plan screen now displays the option to Add Alias. Show Me. Adding a user-defined alias eliminates bringing up the scans to locate the record during order entry. Click Add Alias and the Update Alias window displays. Show Me. If the Alias entered already exists in the system, another window prompts to reset the Alias and assign the new one just entered, or to press Cancel and enter a different Alias.
Employee Security Access, and whether or not an Alias is saved on a Price Plan, determines which Alias prompt displays:
Employee is authorized to update Alias and Alias exists: Alias Code displays as a link and clicking the link opens the Update Alias window
Employee is authorized to update Alias and no Alias exists: Add Alias displays as a link and clicking the link opens the Update Alias window
Employee is not authorized to update Alias and Alias exists: Alias Codes displays as a link and clicking the link results in an error message
Employee is not authorized to update Alias and no Alias exists: Link does not display.
The Alias entered for a Price Plan now displays on the Price Plan Scan. Show Me.
Hot Key Functionality for Favorite Drugs
NOTE: Workstation Requirements for Hot Key Functionality:
Windows XP (Service Pack 3) or Higher Operating System
Current .NET Framework 3.0
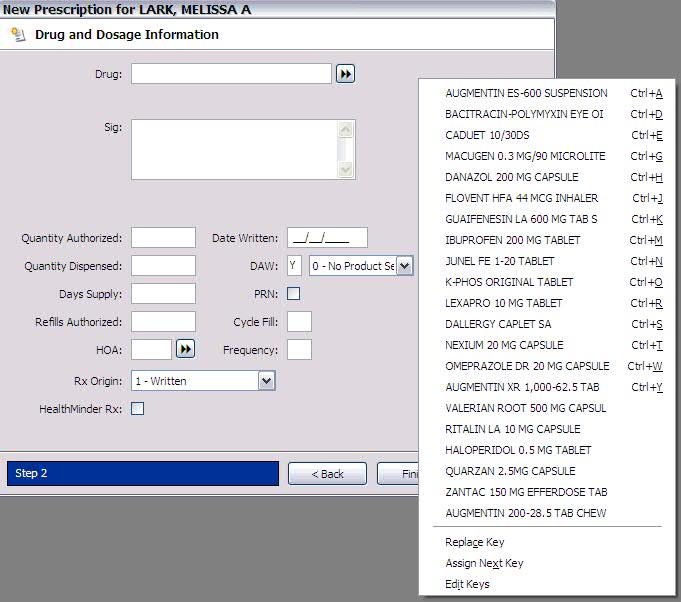
Added the ability to save favorite drugs, and display those drugs on the New Rx screen (both normal filling and electronic filling). Up to 115 favorite drugs can be saved and the first 15 have hot key (CTRL+key) functionality for easy access.
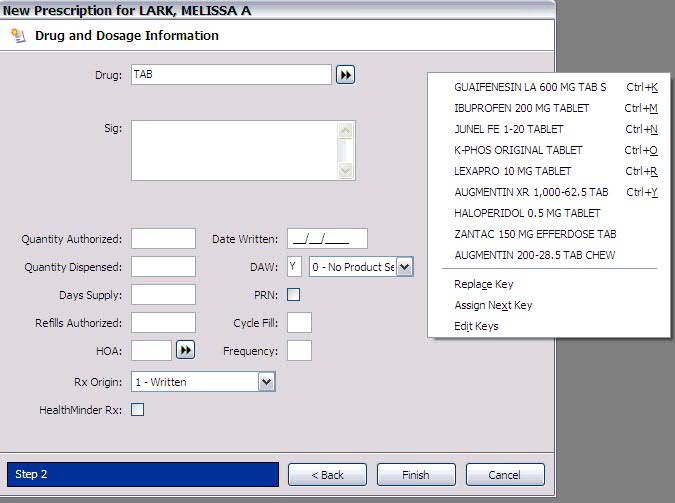
Favorite drugs are added to the list when filling a new prescription. During Step 2, Drug and Dosage Information, select the drug to dispense from the Drug Scan. When the drug displays in the Drug field, right click in the Drug and Dosage Information window. Click Assign Next Key and the drug is assigned a hot key.
When filling a new prescription, Step 2 in the process displays drug and quantity information. Right click on this screen to display a list of saved favorite drugs. Show Me. If text is typed in the Drug field, right click to display only those drugs containing the text entered. Show Me. If text is typed in the Drug field, but there are no keys containing that text, all saved drugs display. When a favorite drug is selected from the menu, the drug information populates on the screen.
The remaining steps on this screen are pre-existing functionality. Three menu options display at the end of the favorites list: Replace Key, Assign Next Key and Edit Keys.
Compound Prescription Monographs
Added the ability to print Patient Education Monographs (PEMs) for each ingredient in compound prescriptions. To print the PEM, the ingredient must have a monograph attached to the Drug Record. Added a new column with check boxes, Print PEM, to the Compound Template. Check each ingredient to print a monograph, or click Check All to print all drugs in the compound. The default is unchecked. QS/1 recommends that monographs be printed to a laser printer with duplexer capabilities.
Store File Direct
Added the ability to make Store File changes for a single prescription without exiting the filling process. Changes can be made from the New Rx Screen and the Rx Summary Screen:
When accessing the New Rx Screen, Store Level Options, Price Plans and Price Tables can be accessed and changed for the prescription currently being filled without closing the New Rx screen. All other Store Control Options are inaccessible. When returning to the New Rx Screen, the prescription is updated with the changes made.
When accessing the Rx Summary Screen, Store Level Options, Price Plans and Price Tables can be accessed and changed for the current prescription. All other Store Control Options are inaccessible. When returning to the Rx Summary Screen, the prescription is updated with the changes made.
Customized Scans
Added the ability to customize settings for scans throughout the system. User-defined settings include column reordering, column resizing, and column display selections. These scan options are specific to where the scan is accessed in the system. For example, the Patient Scan from the Rx Processing Task bar can be customized to show all patients regardless of status, and the Patient Scan from New Order Entry can be customized to show only active patients. Changes made to scans are saved specifically for each User ID. Features of this option include:
Scan width now displays across the full client window. If more columns are added to the scan than will fit on the screen, a horizontal scroll bar displays at the bottom of the scan.
A Show Inactive check box displays below the scan. Check this box to filter out inactive records. The Status Column displays an I for inactive records.
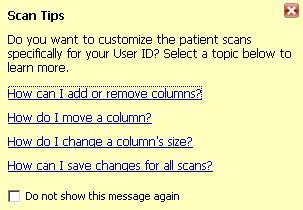
A Scan Tips window displays after accessing the scan. Show Me . To display Scan Tips, click File, Preferences, Options. Check Show Tips under Scans. Click Ok.
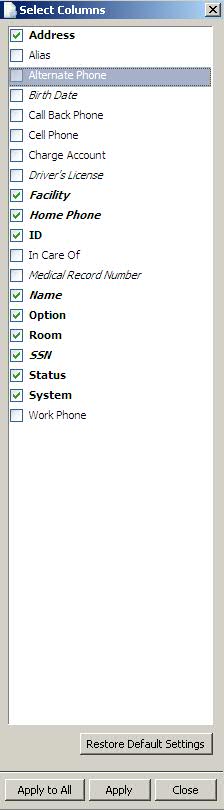
An Edit Columns link displays in the upper right corner of the scan. Click this link and the Select Columns window displays. Show Me. The columns which display in italics are searchable.
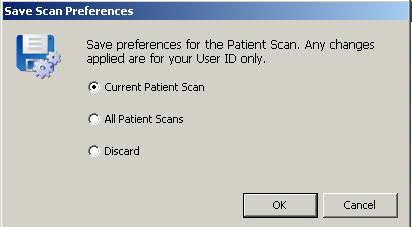
The Save Scan Preferences window displays when the scan is closed. Show Me.
The
Queue Refills function from the Patient Profile Scan now offers the
option to queue prescriptions for InstantFill. Click  and then click Queue Prescriptions for InstantFill. The horizontal
icon bar now displays
and then click Queue Prescriptions for InstantFill. The horizontal
icon bar now displays ![]() .
.
Coupon Card Management
Added the ability to create Price Plans for coupons that are only attached to prescriptions when the drug and coupon match. Prescription processing will skip Coupon Records when determining Price Plans for the prescription. Coupons will not appear as Price Plans on the New Rx screen, but will appear on the main Prescription screen if they are valid for the current prescription.
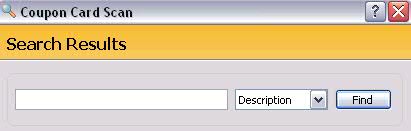
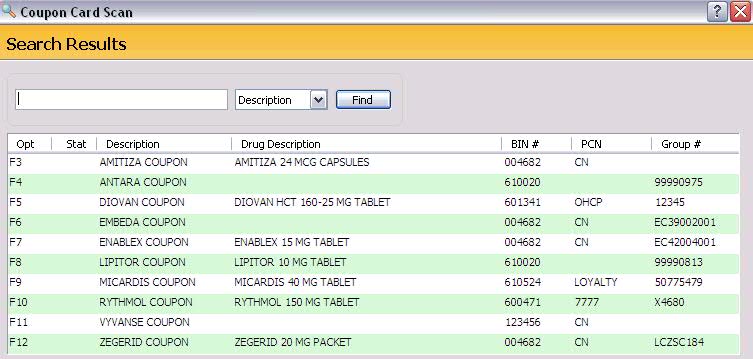
The New Price Plan Wizard now displays the option Click to add new Coupon Card. Show Me. A Coupon Card Scan was added to Store Control, Pricing Options, Coupon Cards. Show Me.
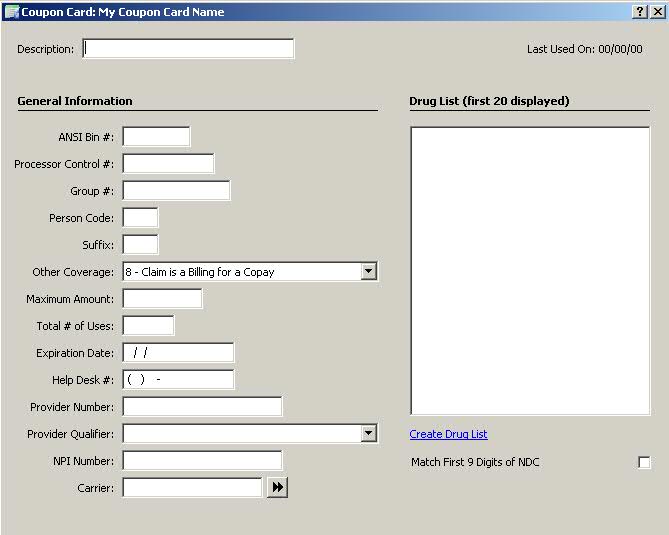
To add a coupon to the Coupon Card Scan, click New from the Coupon Card Scan. The Coupon Card window displays. Show Me. From this window, click Create Drug List and the Drug Scan displays. Double-click the appropriate drugs and the drugs selected display in the Drug List on the Coupon Card window. When complete, click Save.
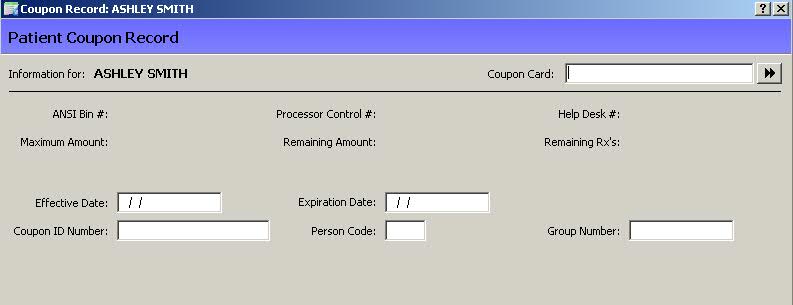
To add a coupon for a patient, access the
Patient Record and click Payment Info on the vertical tool bar. Click
![]() on the horizontal tool bar
and click Coupon. The Patient Coupon Record displays. Click the arrows
next to the Coupon Card field and select the coupon from the scan. When
all coupon information is entered, click Save. Show Me.
Patient coupons are saved in the insurance list.
on the horizontal tool bar
and click Coupon. The Patient Coupon Record displays. Click the arrows
next to the Coupon Card field and select the coupon from the scan. When
all coupon information is entered, click Save. Show Me.
Patient coupons are saved in the insurance list.
Added a Price Plan to Coupon Card Conversion option. Price Plan records are selected from a scan and then identified as Coupon Card Records. To access this conversion option, click System Utilities, Coupon Conversion.
Sidebar
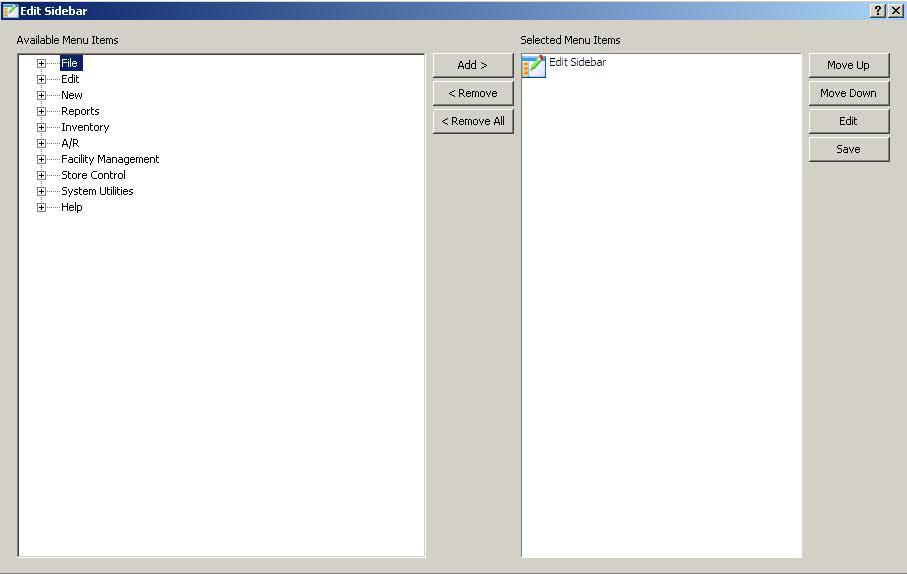
Added a new sidebar on the main screen to facilitate quick access to main menu options. To open the sidebar, click File. Select Preferences and check Show Sidebar. The sidebar displays on the left of the screen with the Edit Sidebar icon. Click the icon and the Edit Sidebar window displays the main menu tree with all items available for display on the sidebar. Show Me.
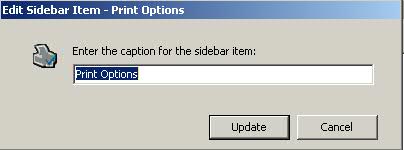
Select an option for the sidebar and click Add. The Add Sidebar Item window displays. Show Me. Edit the caption if you choose and click Add to add the option to Selected Menu Items. To edit the icon caption after it is added to Selected Menu Items, highlight the item and click Edit. The Edit Sidebar Item window displays. Show Me. After editing the caption, click Update and the update option displays in Selected Menu Items.
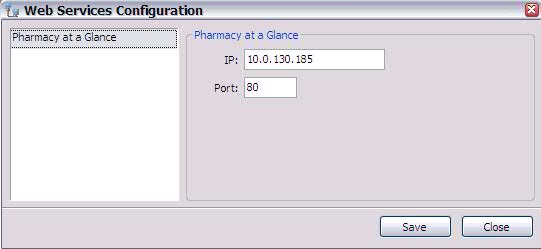
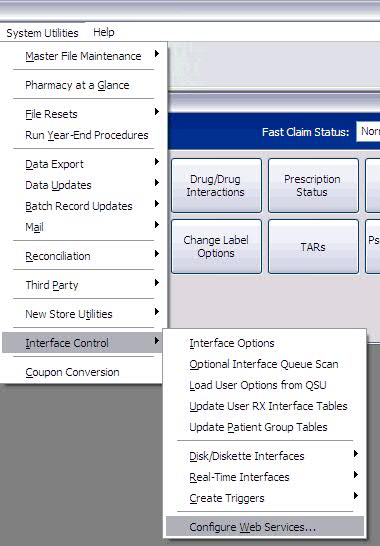
Web Services Configuration
Added a new option, Configure Web Services, to the System Utilities menu. Show Me. Click Configure Web Services and the Web Services Configuration screen displays. Show Me. Each web service displays in a list on the left of this screen. With this release, only Pharmacy at a Glance is available. If a custom IP Address/Port is not assigned for the web service, the Windows Client Gateway is the default. If edits are made to the IP and Port, click Save and the screen re-displays in case further edits are required. If there are no web services available, the Web Services Configuration screen displays No authorized web services were detected. This feature is not available unless the user is authorized for Store Control edits.
Return to NRx Enhancements Archive