19.1.6 NRx Enhancements
Updated
the QS/1 Server to support Windows Server 2008 R2 Operating System.
Delivery/Will Call
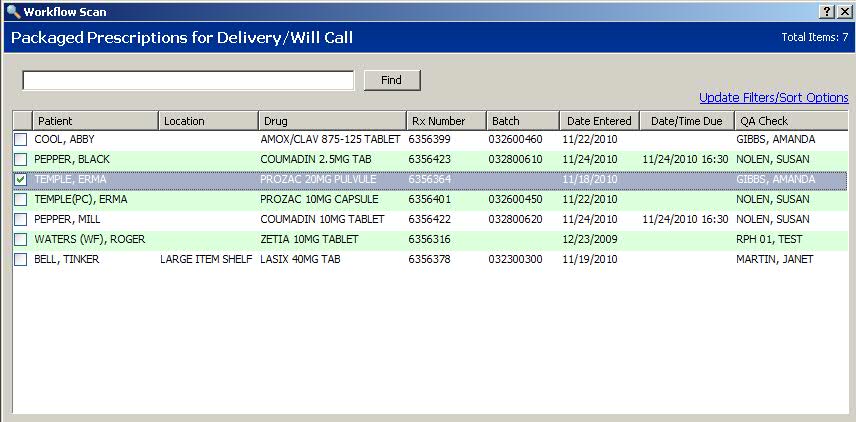
Added a new Workflow
feature, Delivery/Will Call, to facilitate prescription storage and retrieval.
Prescriptions and batch barcodes can be scanned and then placed in predetermined
locations in the pharmacy.
New options to support
Will Call include:
Renamed Patient
Signature with Delivery to Record
Patient Signature in Store Level Options/Rx Processing Options/Workflow
Process.
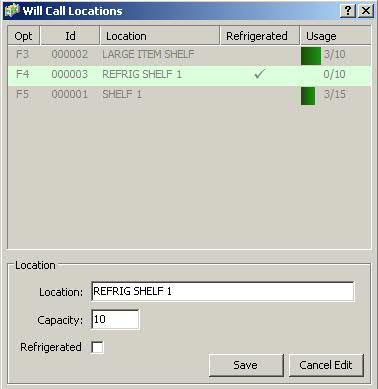
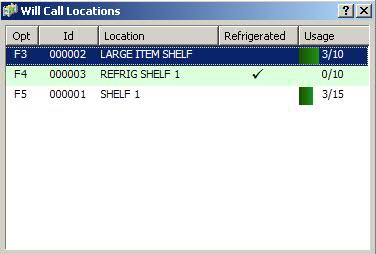
Added a Create Locations link below Record
Delivery Information in Store Level Options/Rx Processing Options/Workflow
Process. Click the link to create Will Call Locations. The table has
entry fields for Location, Refrigerated and Usage/Capacity. When entries
are complete and saved, the link changes to Edit Locations. Click
the link to display the locations. Show
Me. Click Edit
and the Will Call Edit screen displays. Show
Me. To add a new location, click New
. To print shelf labels, click Print.
Show Me.
Added an Auto
Assign Location check box below Create Locations. When checked, locations
are automatically assigned during prescription processing. If Label
and Dispensing is turned on, locations are assigned during this step.
If it is not turned on, locations are assigned in the previous step
(Verification). Prescriptions are assigned to the bin with the most
storage space available. If a batch number has been assigned and one
prescription processed, all subsequent prescriptions are placed in
the same location. If a prescription requires refrigeration, it will
be assigned to a refrigerated location with the most available storage
space. Any additional refrigerated items for the same batch number
will be assigned to the same refrigerated location.
Added Return to Stock After (Days) below
Auto Assign Location. This value cannot be set below the IVR Days
Between Fill and Last Call (if it is in use). During the Service Pack
installation, the default value is three more days than the IVR value.
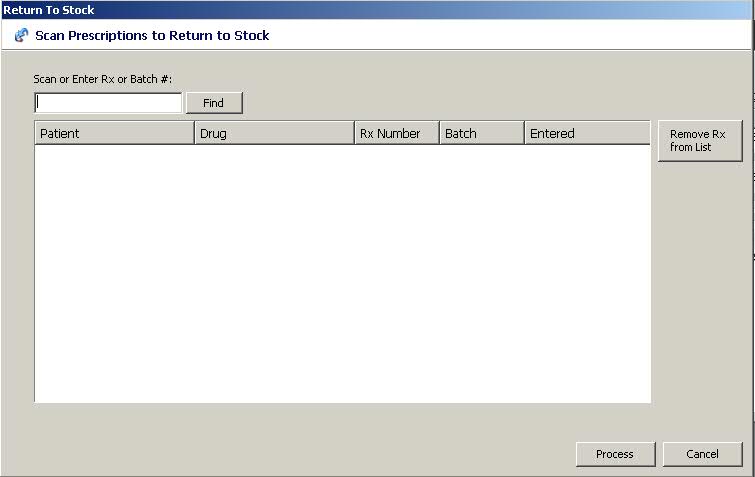
Added the option
to type or scan the prescription number barcode or the batch barcode
to return items to stock. Click  from the Delivery/Will
Call Queue. The Return to Stock screen displays.
Show Me.
Options are:
from the Delivery/Will
Call Queue. The Return to Stock screen displays.
Show Me.
Options are:
Remove Rx
from List: Removes the selected prescription from the list of
returns.
Cancel:
Closes the screen without making any changes and returns to the
Workflow Scan.
Process:
Cancels IVR Call Outs, reverses all claims associated with the
transaction and voids the transaction. Inventory is adjusted,
Workflow and Tickler Records are completed, the prescription is
removed from the batch, prescription and transaction chains are
adjusted and Rx/Tx audit trails are created. Credits are posted
to Accounts Receivable and the prescription is then removed from
the Return to Stock screen.
Added
a button, Assign Locations,
to Rx Processing Tasks. This button displays if the following three
criteria are met: 1) Workflow Delivery/Will Call option is turned
on in Store Control/Store Level Options/Rx Processing; 2) the employee
logged in has the access flag Assign Locations checked; and 3) locations
have been set up in the store. Use this option to scan prescriptions
or batch barcodes. After scanning, the system displays the prescription
or batch. Scan the barcode again to select a location.
Added
two columns, Location and Price, to the Prescription Status screen.
Added
a description of Delivery/Will Call to Transaction Billing History
Records.
Added
a row, Delivery/Will Call, to the Workflow Additional Information
screen which is accessible from the Transaction, Prescription Records
and Workflow Queue.
Added
an option, Use these options for future Workflow Lists?, to Select
Options in Workflow. Select this option for any Workflow tasks and
the Select and Sort options are bypassed, and the selected queue displays
immediately.
Added
a check box, Refrigerate, to the Drug Record Additional Information
screen.
Added
a check box, Refrigerate, to the Compound Drug Record Additional Information
screen.
Added
a report, Return to Stock List, to print items that were not picked
up and are due to be placed back on the shelf. This report is found
in the Delivery/Will Call Queue.
Added
a security access option, Assign Locations, to Workflow. This option
must be checked for the employee signing onto the system to display
the Assign Locations icon on Rx Processing Tasks.
Added
a label routine, 617 - Deliv/Will Call Location, to print the location/description
in Will Call.
Pharmacy at a Glance
Pharmacy at a Glance
is a new dashboard application which enables pharmacies to view statistical
data from Workflow, Tickler, the ECS Log and Electronic Information. Functions
added to support this new module include:
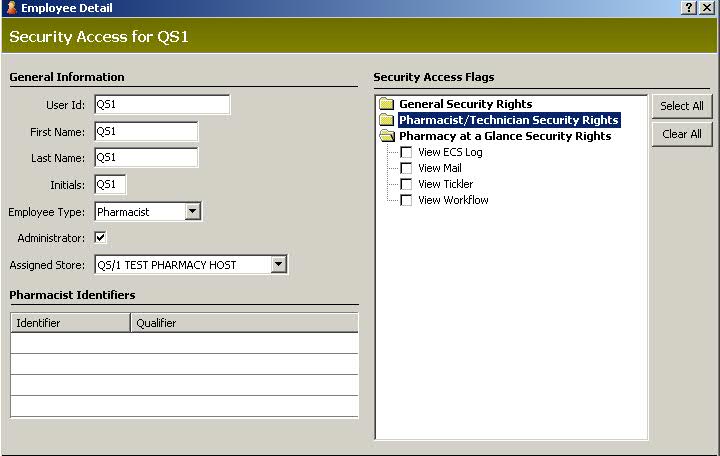
Added
Pharmacy at a Glance Security Rights to the Employee Record. Show
Me.
Added
Pharmacy at a Glance to the System Utilities menu. When selected,
this launches the dashboard application. Show
Me.
Updated
the ECS Log to filter results based on status: (None), DUR Messages,
PPE Messages, Failed Claims, Paid/Captured Claims, Rejected Claims
and Reversals.
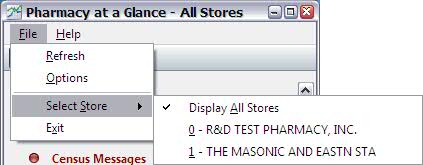
Added
a File menu which includes Refresh, Options, Select Store and Exit.
Show Me.
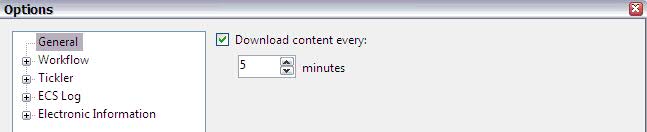
Click Refresh and the web service
refreshes the data displayed in the dashboard. Click Options to set
the download frequency for each category. Show
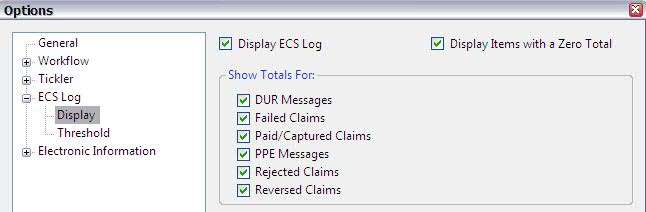
Me. Open Workflow, ECS or Tickler categories and
click Display in each category to set options. Show
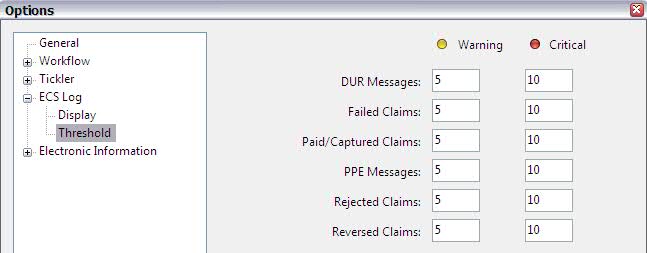
Me. Click Threshold under each category to set
the Warning and Critical threshold counts. Show
Me.
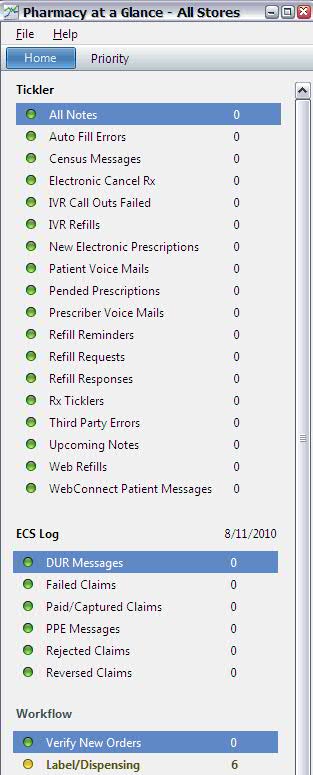
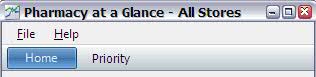
Added
Home and Priority to the horizontal menu bar. Show
Me. Click Home and counts for Tickler, ECS Log,
Workflow and Electronic Information categories display. Show
Me. Click on any option in any category to display
the scan for that option. Users must have security access set up to
view a section, or sections, of the Home panel. Click Priority
and user-defined warning threshold counts display. Show
Me.
First DataBank's
Drug Allergy Module (DAM) 4.0
Updated
the current drug allergy screening program to First DataBank's Drug Allergy
Module (DAM) 4.0. This module screens for both active and inactive ingredient
allergies. The allergen pick list, created and maintained by FDB, is now
available for the selection of an allergy. QS/1 has combined patient allergies
(currently stored across several files) into Clinical Data File Records.
Up to 99 allergies can be added to each Patient Record. Functions
added to support this new module include:
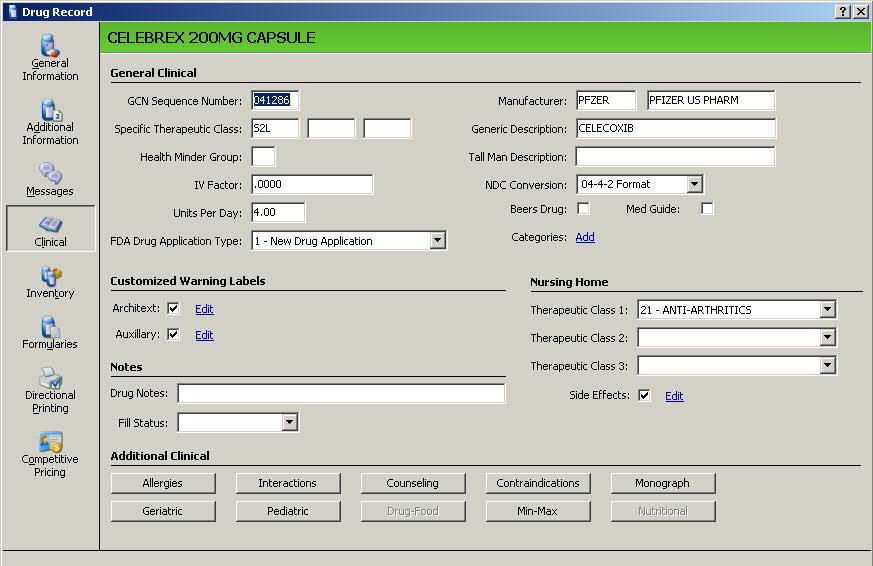
Updated
the Drug Record/Clinical window to include testing for inactive ingredients
to determine if allergies are available for the drug. If allergies
are available, the Allergies button is enabled. Show
Me. Click the Allergies button and the allergies,
both active and inactive, and their status display. Inactive ingredients
are based on the NDC number of the drug and active ingredients are
based on the GCN sequence number. Show
Me.
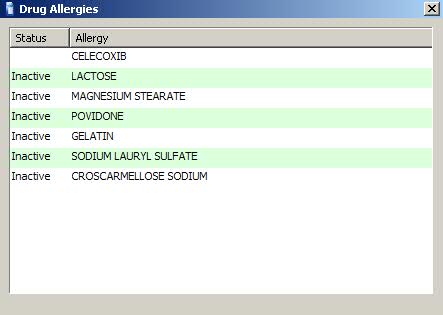
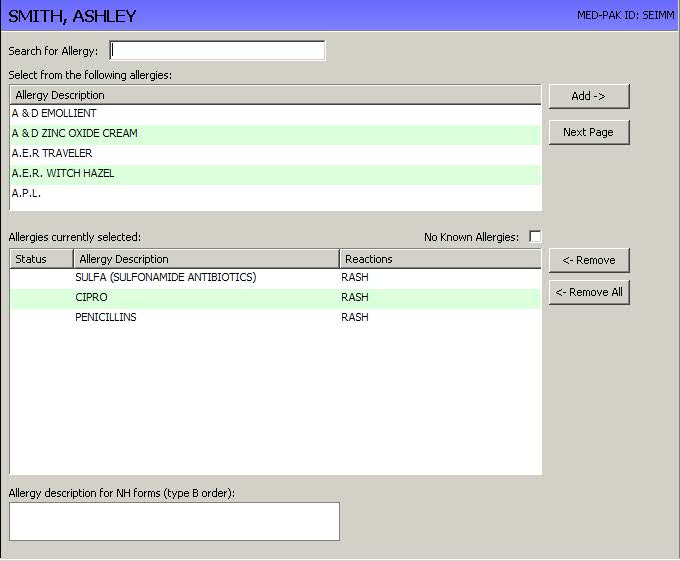
Added
a Status column under Allergies
currently selected on the Patient Record/Allergies screen.
A # sign displays for allergies
flagged for deletion and an R
displays for allergies retired without replacement. Show
Me. More than 10 allergies now display if available.
If
the No Known Allergies box
is selected on the Patient Record/Allergies screen, the system automatically
checks for existing allergies flagged for deletion. If allergies are
detected, the message, Allergies
exist for this patient, unable to add No Known Allergies,
displays.
If
an allergy is added for a patient, the system automatically checks
to see if that allergy exists, but is flagged for deletion. If the
allergy exists, the record is unflagged, saved and the message, Allergy (name of allergy) was Reactivated,
displays. If the allergy exists, but is not flagged for deletion,
the message, Allergy (name of allergy)
Already Exists, displays.
Updated
all Patient Chart Reports to print active patient allergies and corresponding
reactions from the new clinical data file.
Updated
Price Code/Plan Messages to read patient allergies from the new clinical
data file.
Updated
numerous reports
to read patient allergies from the new clinical data file.
Updated
clinical checking (allergy and cross-sensitivity) to include active
and inactive drug ingredient codes. If a drug has not yet been reviewed
by First DataBank for inactive ingredients, a message displays indicating
inactive ingredients could not be screened and the package insert
for the drug should be reviewed.
Added
a new message which displays after allergies have been checked and
there are cross-sensitivity hits. The message is:
The
patient has reported an allergy to (allergy description). The patient
may also have a
cross-sensitivity
to (drug name) which is a (allergen group description), related to the
allergy
group (cross-sensitive allergen group description).
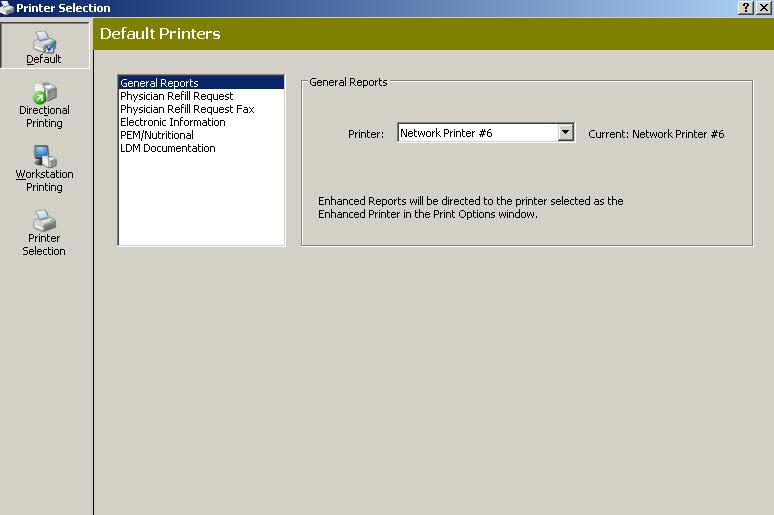
File Options
Created a single screen to display all printer
defaults for each document in the system. Click File, Default Printer
Selection. The following options display:
Default:
Displays a list of documents with the option to assign each document
to a specific printer. Show
Me.
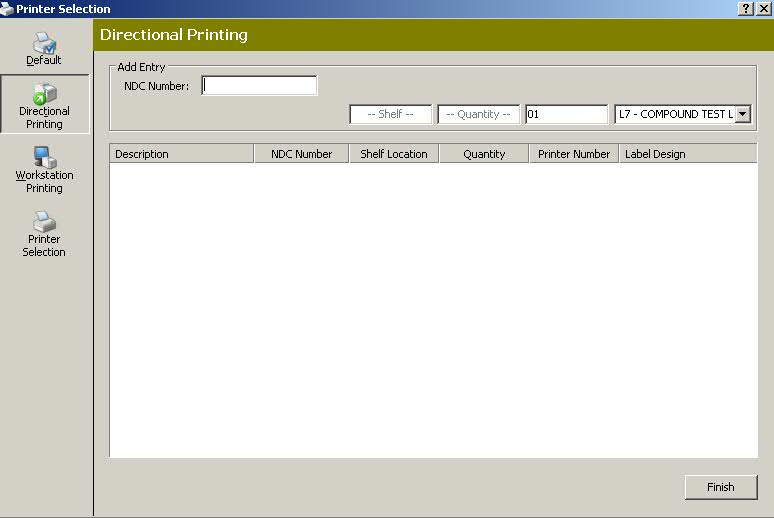
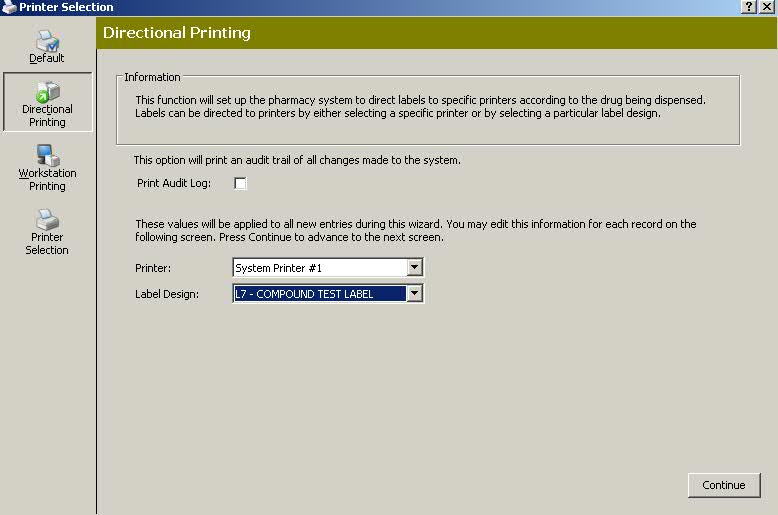
Directional
Printing: Offers the ability to direct labels to specific printers
according to the drug dispensed. Show
Me. When the printer and label design are selected
from the drop-downs, click Continue to select the drug. Show
Me.
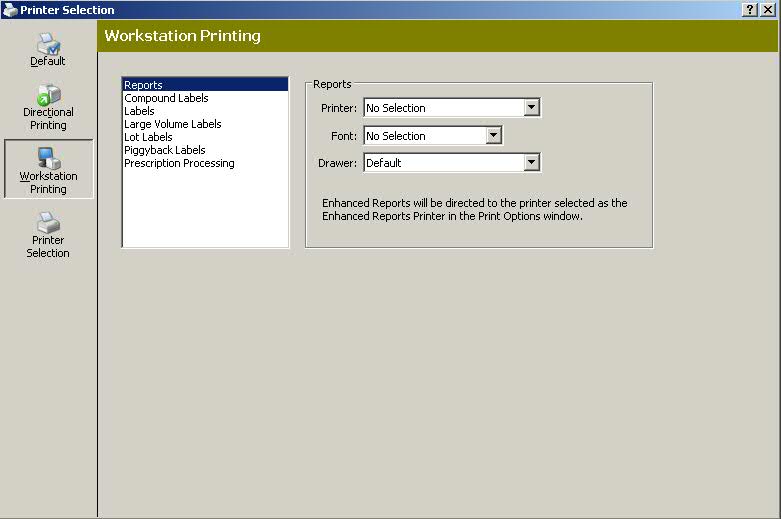
Workstation
Printing: Displays a list of documents with the option to select a
printer, the font and drawer for each document displayed. Show
Me.
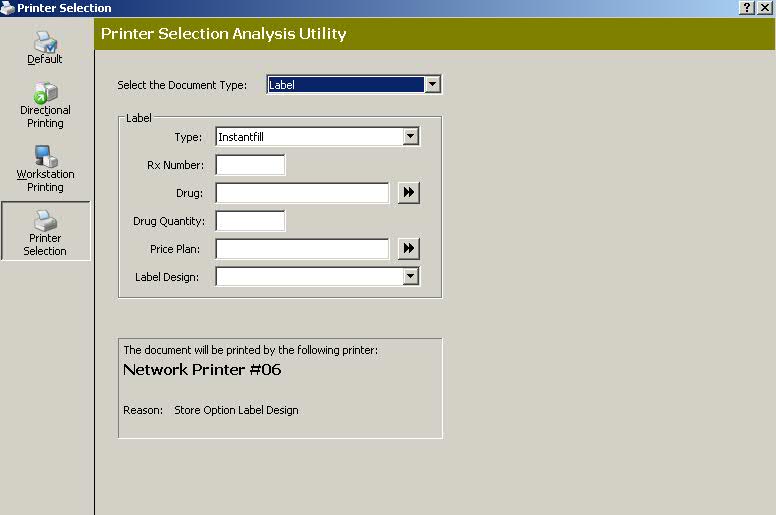
Printer
Selection Analysis Utility: Offers the option to view which printer
is selected for a given document, along with the reason for the selection.
Show Me.
Prescription
Processing
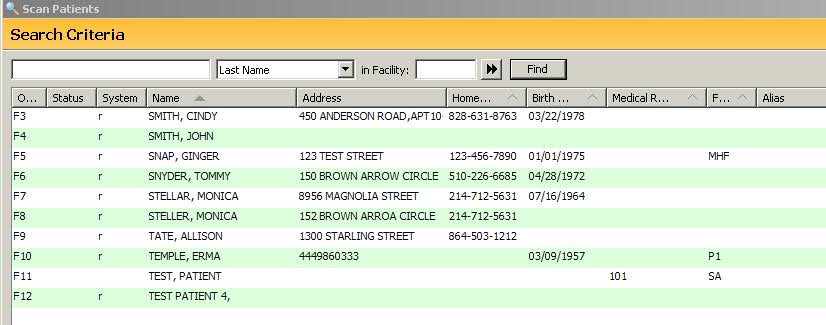
Added a new
column (Sys) to the Patient Search
scan to indicate which QS/1 products contain the Patient
Record. The Sys column product codes are:
prh
= POS, Pharmacy and HME Patient
pr
= Pharmacy and POS Customer
ph
= POS and HME Patient
rh
= Pharmacy and HME Patient
r
= Pharmacy Patient
p
= POS Customer
h
= HME Patient
Renamed two
fields on the Drug Record General Information screen Package section.
Package is now Size and Cost is now Cost (AWP).
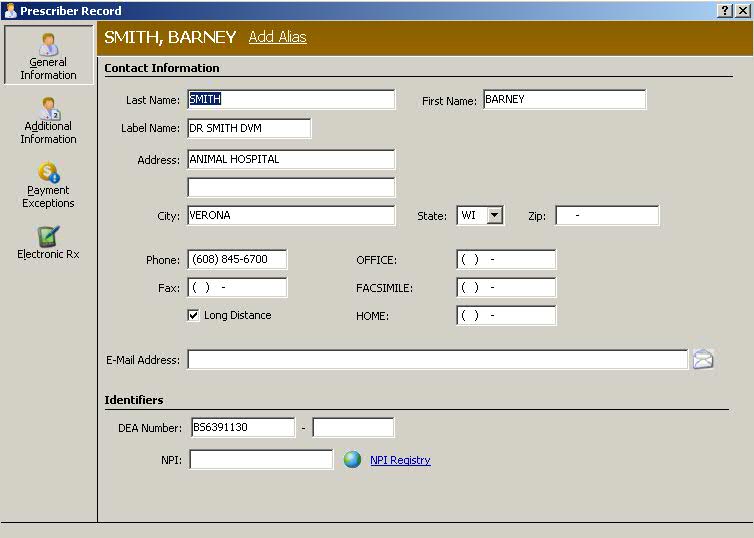
Expanded the DEA Suffix on the Prescriber Record
to 11 positions to support ePrescribing Updates. Expanded the Prescriber
name field:
Last
Name field contains a maximum of 30 characters
First Name field contains
a maximum of 25 characters
The sum of these two
fields equals a maximum of 50 characters, including the comma and space.
The position of the comma
moves depending on the length of the last name.
For example, if the last
name contains 30 characters, the first name can only contain 18, plus
the comma and space to equal a total of 50 characters being saved.
Another
example, if the last name contains 25 characters, the first name can contain
23, plus the comma and space to equal a total of 50 characters being saved.
The Prescriber Record has been rearranged; the Identifiers section is
now Prescriber Identifiers and the DEA Number field supports the 11 character
suffix. Show
Me. Also expanded the following fields: State Code
field from 11 to 25 characters, Medicaid # field from 10 to 20 characters,
and the Email field from 40 to 80 characters.
Added the following information
to electronic prescription hardcopy: the Rx Tracer C Reference Number
for all states, the prescriber reference number (35 alpha-numeric characters)
for all states, and Sender Line to electronic prescription hardcopy for
Iowa.
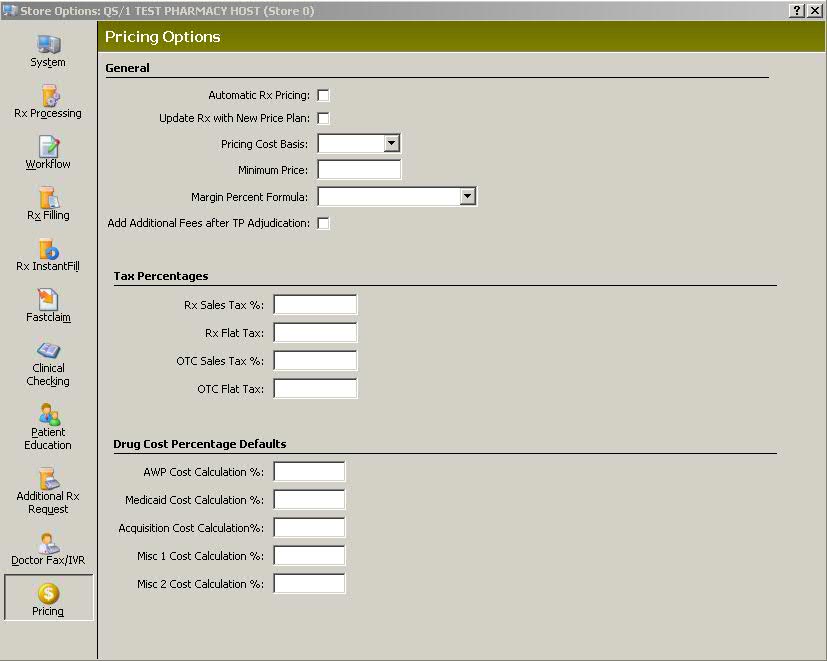
Added a field, Add Additional
Fees after TP Adjudication, to Store Level Options/Pricing Options. Check
this field to add patient fees to the transaction after third party adjudication
has been completed. Show Me.
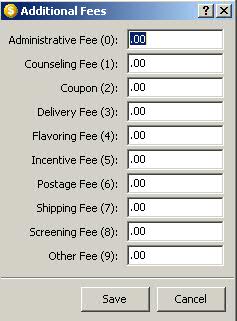
When this option is checked, the Transaction Record displays Additional
Fees in the Billing Recap. Show
Me. Click Additional Fees to display a pop-up window
with fees and the dollar amount (user-defined) to be added. Show
Me. To use this option, check the employee security
access flag, Update Checked Out, under Transaction Access.
Enlarged the image size
of the prescription, drug or dispensing image that displays to the right
of the Rx Summary. Screen resolution must be at least 1280 pixels in order
to view the new size. If Workflow is being used, the NDC verification
bar displays at the top of the Prescription Record, taking the place of
the NDC verification pop-up window. If running an NDC verification for
an electronic prescription, the electronic prescription information displays
to the right of the Rx Summary, with the title being a link to the electronic
information display.
Added a feature to the
Drug, Prescriber and Patient Records which allows an alias to be entered.
Show Me.
Adding a user-defined alias eliminates bringing up the scans to locate
the record during new order entry. When entering a new prescription, type
the alias in the Patient, Prescriber or Drug fields to automatically populate
this information without accessing the scans.
Modified the Workflow process
to check for the Require Hardcopy Scanning flag in Store Level Options/Rx
Filling Options. If the flag is checked, and the Rx Origin field on the
Prescription Record is 1, 2 or 4, the prescription may only be profiled
in any step of Workflow until the prescription hardcopy is scanned.
Added a feature, Suggested
Prescription Bottle Size/Packaging List, which is especially beneficial
for pills dispensed via pill dispensing systems because it maximizes bottle
usage by suggesting the appropriate size bottle for the medication dispensed.
Functions added to support this new feature include:
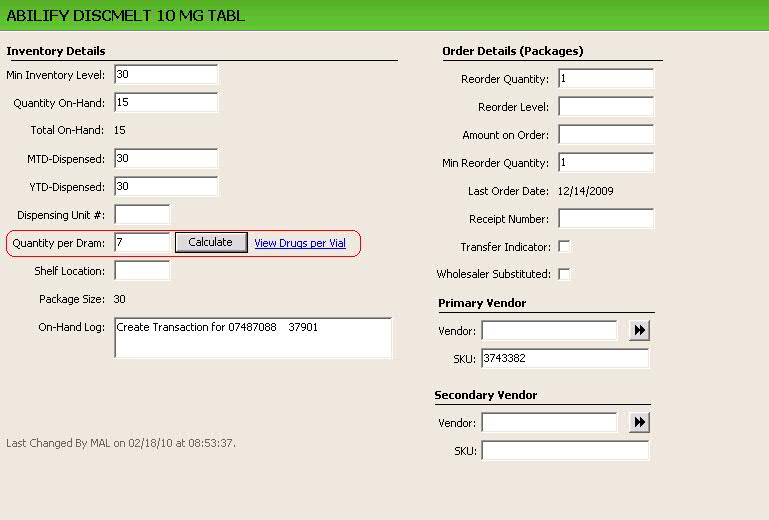
Added a field, Quantity per Dram to
the Drug Record Inventory Screen. Show
Me. Click View Drugs per Vial to display a list
of vial sizes currently available in stock. Bottle sizes not in stock
are greyed out. Click Calculate and the Calculate Quantity Per Dram
wizard displays. Follow the instructions to find the calculated quantity
per dram for the drug.
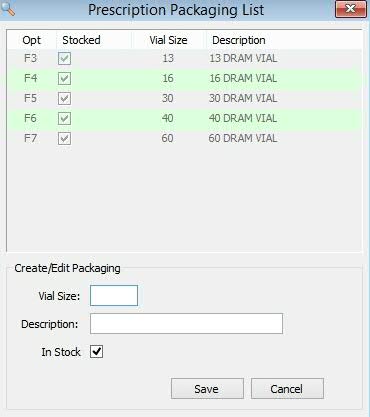
Added a option, Prescription Packaging
List, to Store Level Options/Rx Filling Options. Click Create to display
the Prescription Packaging List. Show
Me. This information is populated after accessing
the Drug Record Inventory Screen and calculating the Quantity per
Dram and the Drug per Vial.
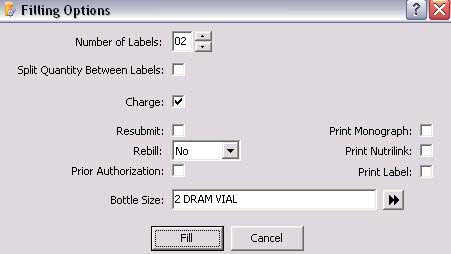
Added a field, Bottle Size, to Filling
Options. The system calculates the smallest bottle available in which
the medication will fit. If it will not fit in one bottle, it calculates
the number of bottles required using the largest size available. If
more than one bottle is required, the appropriate number of labels
will print. Show
Me.
Added a option, Default Date Written as Blank, to Store Level Options/Rx
Filling Options. Check this box and a red asterisk displays next to Date
Written on the New Prescription screen indicating a required entry. The
date must be populated before processing can continue.
Added a option, Perform POS Check, under Quality Assurance Check in
Store Level Options/Rx Processing. Check this box to prevent prescriptions
that have not been processed through QA from being checked out in Point-of-Sale.
This option does not display if not authorized for Point-of-Sale.
Added the option to print the DPS Number on the Daily Audit Report (Prescription).
Select Option 7 for Prt Detail...? on the Print Option screen.
NRx and Multi-Site Management Systems Only
Updated Transaction Billing Information
to change fields that can be updated:
On the General Information screen of
the Transaction, changes to Quantities, Dates, Days Supply, Rx Origin
or A/R cannot be made. The Date Change option is disabled. Changes
to the Lot Number, Delivery Method and Label Information can be made.
On the Additional Information screen
of the Transaction, changes to Prescription Monitoring, Partial Fill,
Coupon and Intermediate Authorization fields cannot be made. Changes
to Miscellaneous and Printer Option fields can be made.
On the Delivery Information and Transaction
Signature screens, changes can be made.
On the Primary, Secondary and Tertiary
Billing screens, changes cannot be made. Functions for Reversing and
Resubmitting are still enabled.
On the Transaction History screen from
the prescription, update functions are disabled.
On the System Utilities menu, Transaction
Batch File Updates and On-Line Transaction Updates are disabled.
Transactional Accounting
Added options to record
and report transaction amount changes with a focus on items that adjust
revenue:
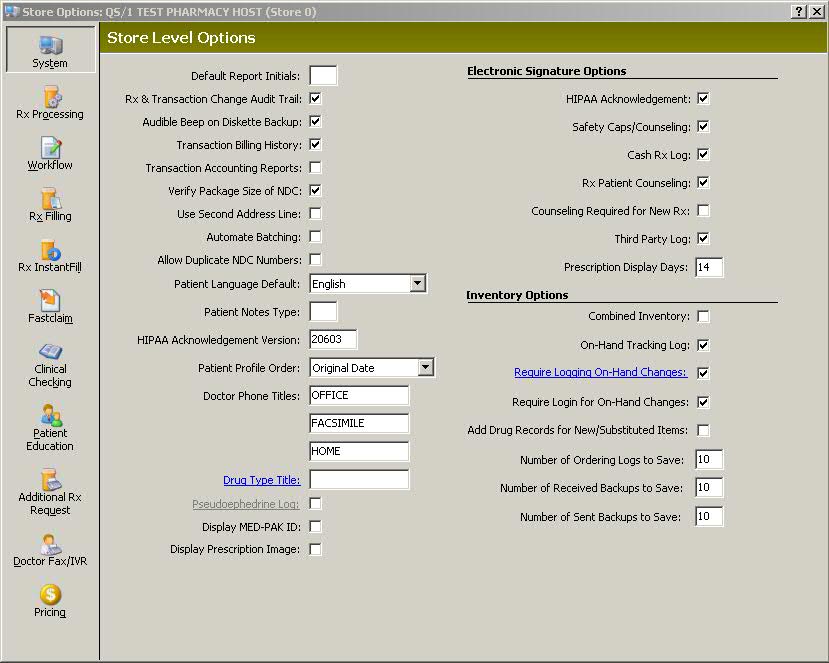
Added a Store Level Option, Transaction
Accounting Reports, as a check box. Show
Me. When checked, Transaction Billing History
is automatically checked and the Daily Audit, Monthly Audit, Sales
Analysis and Revenue Reports print adjusted values.
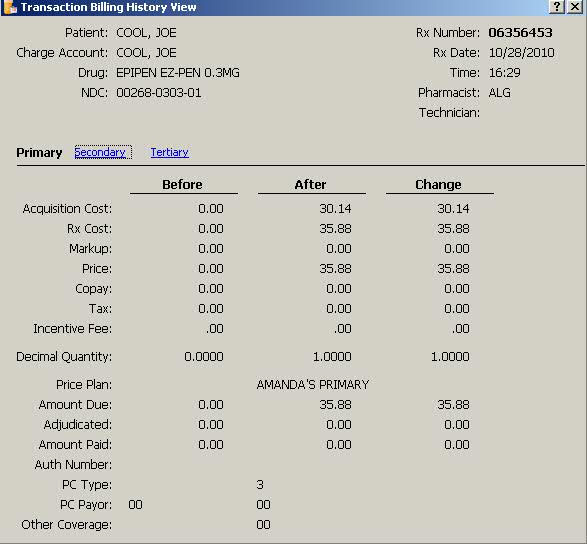
Updated Transaction Billing History
to display amount changes. Columns display the amount before and after,
as well as the actual change. The ability to toggle between primary,
secondary and tertiary views is available. Show
Me.
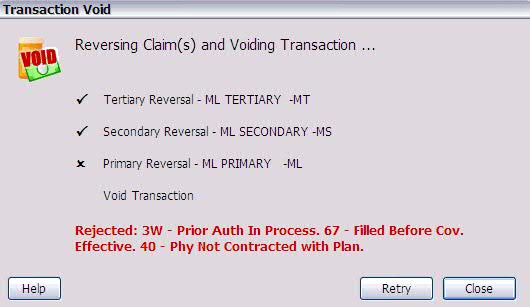
Added a transaction automatic reversal
feature. When a claim is voided, the system automatically reverses
the claim for that transaction. Show
Me. If an error is encountered, a message displays
the reason for the error, along with the option to Retry. Show
Me.
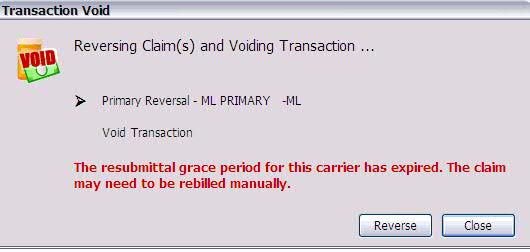
If the grace
period for claim resubmittal has expired, the system prompts to re-bill
manually. Show
Me. The system automatically displays warnings
and prompts if errors are encountered during this process.
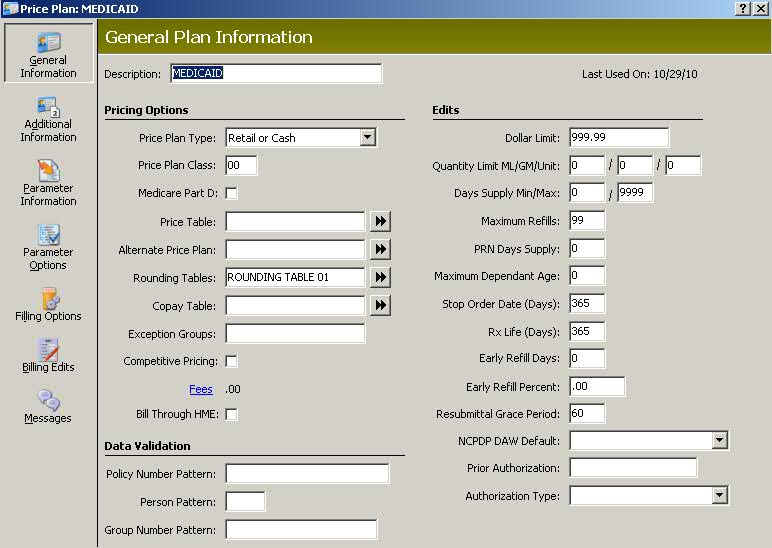
To support rebilling
manually, a field, Resubmittal Grace Period, was added to the Price
Plan General Information screen. Show
Me.
Reports
Added
the ability to store Custom Report Templates on the QS/1 Customer Support
Web Site with the option to export report templates to the site to share,
or import templates from the site into your system:
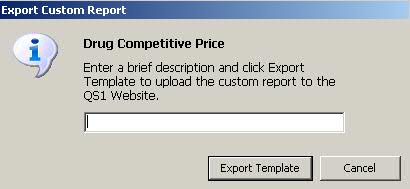
Click Reports. Select Customized and click
Select a Saved List. The Custom List scan displays. Select a report and
click Export. The Export Custom Report displays and prompts for a brief
description for the report (up to 56 characters). Show
Me. Type the name/description of the report and click
 .
.
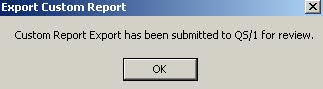 displays when the report is exported
successfully to QS/1.
displays when the report is exported
successfully to QS/1.
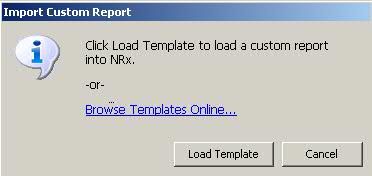
Import a Custom Report
Click Reports. Select Customized and click
Import. The Import Custom Report window displays. Show
Me. The first option from this screen is to click
Load Template which opens the folder for the last saved file from the
web site. The second option is to browse the QS/1 Web Site for reports
saved online. Show
Me.
Select a Custom Report Category and select
a report from the list. Click the Report Name to review the printed fields.
Click Download to save a copy to the workstation that accessed the web
site. When the download prompt displays, click Save. Select a file location
on the hard drive for the report and click Save. Click Close.
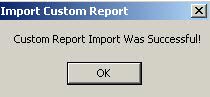
Access Customized Reports and click Import
List. Click Load Template. Select the name of the report and click Open.
A message displays indicating a successful import:
Return
to NRx Enhancements Archive