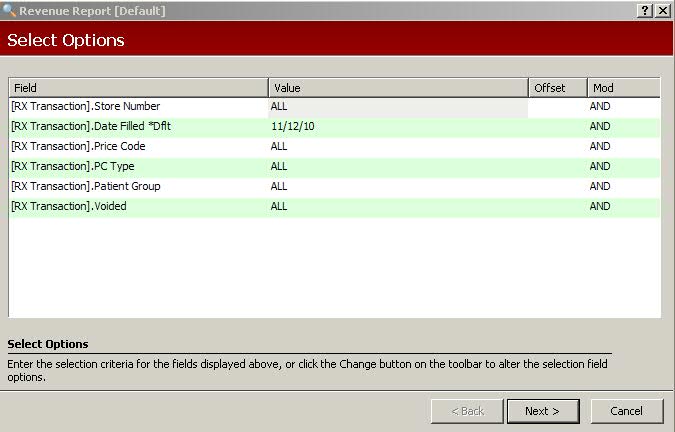
The first screen to display when a report option is selected is the Select Options screen. This screen gives you the ability to select files, and the fields associated with them, from which to pull data for the report. You may select up to twelve files/fields.
Select Options are used to narrow search criteria, but they do not control what is printed on the report. The Select Options have preset default files that are commonly used, but these selections may be changed to meet your criteria.
For our example, the Management Report/Revenue Report is used. Click Reports. Select Management and click Revenue Report. Select Options display:
The columns on the Select Options screen are:
Field
-The file [Rx Transaction] and field name [Store Number] used for
the selection choice. To change the default options, click ![]() on the horizontal menu bar. Change Selection Fields displays:
on the horizontal menu bar. Change Selection Fields displays:
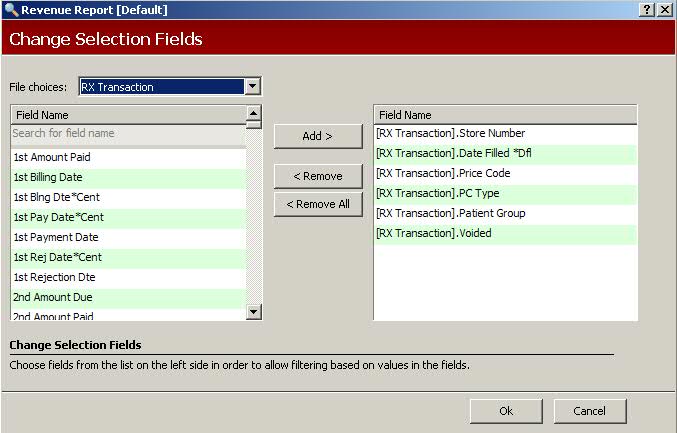
The default values display in the right window.
File Choices and Field Names display on the left. Options are to Add,
Remove or Remove All selections. When complete, click ![]() .
.
Value - The value is used to specify the exact data you need for your report. Review Value Field Options.
Offset - The Offset column is used to select records with figures entered in certain places in a particular field. For example, to select all insurance policies with the numbers 1234 in positions 12-15, type 1234 in the Value field. Tab to the Offset field and type 11. The system skips the first 11 positions of the field.
Mod - The Modifier default is AND which includes each line selection and ALL selections must be met. Set to OR to indicate that particular selection OR the following line selection must be met.
When Select Options are complete, click  to display Sort Options.