The Delivery Sheets report option lists all prescriptions filled for a particular facility on a particular day.
To print Delivery Sheets:
1. Access NRx.
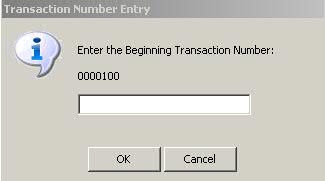
2. Click Facility Management, Delivery Sheets. The following window displays:
3. Type the first transaction number to begin the print process and click OK.
 Typing the first transaction
number shortens the sort process. For example, if there are 100,000 transactions
in the Transaction File and a beginning number is not entered, the system
sorts through every transaction in the file. The other option is to set
the beginning transaction number to zero and use the Select Options to
sort and print the required transactions.
Typing the first transaction
number shortens the sort process. For example, if there are 100,000 transactions
in the Transaction File and a beginning number is not entered, the system
sorts through every transaction in the file. The other option is to set
the beginning transaction number to zero and use the Select Options to
sort and print the required transactions.
4. Select Options display:
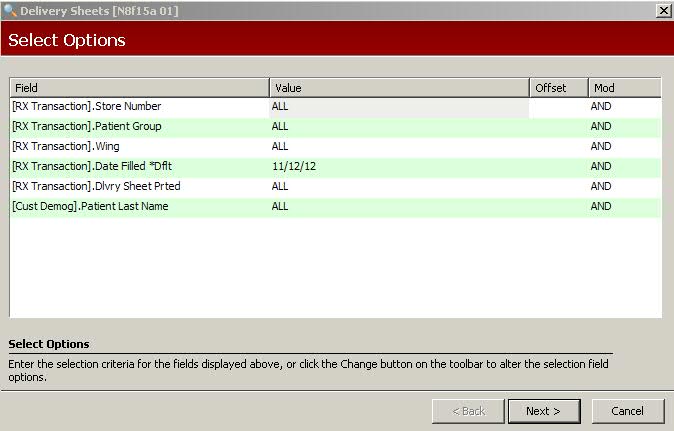
5. Complete the Select Options and click Next. Sort Options display:
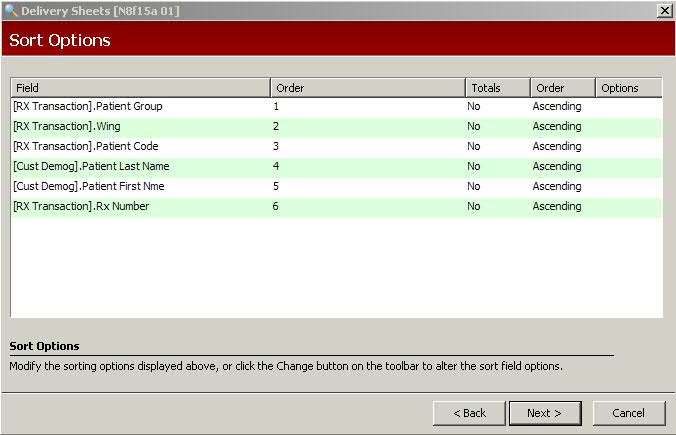
6. Complete the Sort Options based on the type of Delivery Sheet to print:
Transaction Delivery Sheet Sort Options are : (1) Patient Group, (2) Delivery Track #, (3) Wing, (4) Patient Name and (5) Rx Number.
Fill List Delivery Sheet Sort Options are: (1) Patient Group, (2) Batch Number, (3) Delivery Track #, (4) Patient Name and (5) Rx Number.
Workflow Consolidated Delivery Sheet Sort Options are (1) Patient Group, (2) Delivery Track # and (3) Patient Name.
7. When Sort Options are complete, click Next. Print Options display:
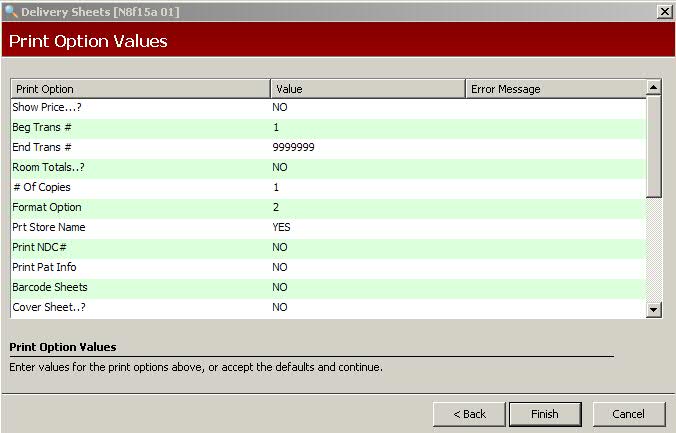
8. Complete the Print Options using the following definitions:
Show Price: Type YES to print the price of the items on each line. Type COP to print the copay amount.
Beginning Trans #: Type the transaction number to begin printing. An entry of at least 1 must be entered.
Ending Transaction #: Type the transaction number to end printing.
Room Totals: Type YES to print a separate page listing the total dollars of the drug cost and total prescription price per bed for the Delivery Sheet.
# of Copies: Type the number of sheets to print.
Format Options: Valid entries.
Prt Store Name: Type YES to print the store name on the Delivery Sheet.
Print NDC #: Type YES to print the Drug NDC #.
Print Patient Info: Select YES to print one patient per page with the patient name, address, telephone number and the In Care Of field. Select YA2 to print everything that selecting YES does, but to also insert the Patient Address Line 2 under the Patient Address.
Barcode Sheets: Type YES to print the delivery number barcode on the cover sheet. NOTE: To use the barcode option, you must have a laser that is barcode 128 capable.
Cover Sheet: Type YES to print facility information on the cover sheet.
Export File: Type YES or NO.
Export Path: If Export File = YES, type the path to use to create the file and it will be written to that location on the terminal where created.
Print Dsp Unit: Type YES to print the Dispensed Unit.
Print Med Rec#'s: Type YES and Show Price is overwritten.
Collate Copies: This option is used in conjunction with the # of Copies option. Type YES and the system checks # of copies and prints the copies in complete sets.
Delivery Note: Type YES to print the note at the end of the Delivery Sheet.
Delivery Svc: Type YES to export and save the DelSheet*.Dat file to the local QS1 folder and then call Delivery Sheet web services.
8. When Print Options are complete, click Finish. A Delivery Sheets General Comments screen displays. Type a message to print at the bottom of the sheets. To keep the message, click Save Message for Future Use. Click Next. The Delivery Sheets begin to print.
Return to Facility Management Overview